

Tile Overhaul: How to Install Laminate Flooring Over Existing Tiles Effortlessly
Tile Overhaul: How to Install Laminate Flooring Over Existing Tiles Effortlessly
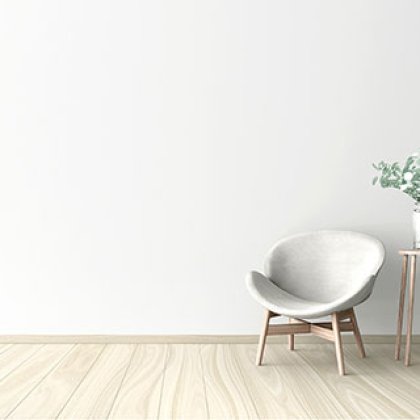
Are you looking to update your space with new flooring? If you already have tiles in place, you might be wondering if it's possible to install laminate flooring over them. The good news is, it can be done! In this article, we'll provide you with expert tips and guidance on how to install laminate flooring over existing tiles, giving your room a fresh and stylish look without the hassle of removing the old tiles.
Key Takeaways:
- Installing laminate flooring over existing tiles is a cost-effective way to upgrade your space.
- Assess the condition of your existing tiles before installation to ensure a smooth and durable result.
- Gathering the necessary tools and materials is crucial for a successful laminate flooring installation.
- Properly preparing the tile surface and installing underlayment and a vapor barrier are essential steps in the process.
- Follow a step-by-step guide to lay the laminate flooring and add finishing touches for a professional result.
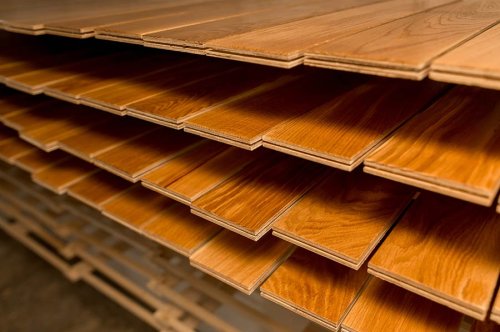
Why Choose Laminate Flooring Over Tile?
When it comes to flooring options, laminate is a popular choice among homeowners for good reason. Laminate flooring offers a myriad of benefits that make it a superior option to traditional tile. In this section, we will delve into the advantages of choosing laminate flooring, including durability, affordability, and style options.
Durability
Laminate flooring is designed to withstand heavy foot traffic and daily wear and tear, making it an ideal choice for high-traffic areas like entryways, kitchens, and living rooms. With its scratch-resistant surface, laminate flooring is more resistant to damage compared to tile. It is also less prone to cracking, chipping, and fading, ensuring that your flooring will remain in pristine condition for years to come. Its durability makes it an excellent choice for families with children and pets.
Affordability
One of the biggest advantages of laminate flooring is its affordability. Compared to tile, laminate flooring is significantly less expensive both in terms of materials and installation costs. With laminate, you can achieve the look and feel of expensive materials like hardwood or stone at a fraction of the price. This cost-effectiveness allows you to upgrade your home without breaking the bank.
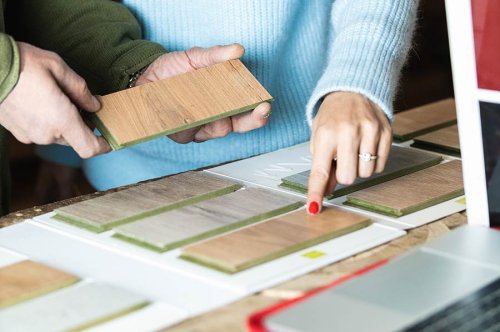
Style Options
Laminate flooring offers a wide variety of design options to suit any aesthetic preference. Whether you prefer the natural warmth of wood or the sleek look of stone, laminate flooring can replicate the appearance of various materials with impressive realism. Manufacturers have made significant advancements in the visual appeal of laminate, offering a vast selection of colors, patterns, and textures to complement any interior design style. From rustic farmhouse to modern minimalism, you're sure to find a laminate flooring option that perfectly matches your vision.
By choosing laminate flooring over tile, you can enjoy the benefits of long-lasting durability, cost-effectiveness, and a vast array of style options. Now that you understand the advantages, it's time to explore the next steps in the installation process.
Assessing the Condition of the Existing Tile
Before installing laminate flooring over tile, it's important to thoroughly assess the condition of your existing tile. By following best practices, you can determine if the tile is suitable for laminate installation and prepare the surface for a successful project.
Determining Tile Suitability
- Inspect the tile for any cracks, chips, or loose pieces. Damaged or unstable tiles may need to be repaired or replaced before proceeding with the installation.
- Check the levelness of the tile surface. Uneven or sloping tiles can impact the stability and appearance of the laminate flooring. Use a level to assess any irregularities.
- Consider the age and condition of the tile. Older tiles may have worn finishes, making them less suitable for installation as they may not provide a solid base for the laminate.
Preparing the Tile Surface
Once you've determined that your tile is suitable for laminate installation, it's essential to prepare the surface properly. This will ensure a smooth and long-lasting result. Follow these steps:
- Thoroughly clean the tile: Remove any dirt, dust, or debris from the tile surface. Use a mild cleanser and a scrub brush to ensure a clean, smooth surface for the laminate flooring.
- Remove any wax or sealant: If your tile has a wax or sealant coating, it must be removed before installing laminate. Use a wax stripper or sealant remover, following the manufacturer's instructions.
- Check for moisture: Moisture can cause laminate flooring to warp or buckle. Use a moisture meter to ensure the tile surface is dry. If there are signs of moisture or high humidity, it may be necessary to address the underlying issue before proceeding with installation.
- Repair any imperfections: Fill in any cracks, chips, or low spots on the tile surface using an appropriate filler. Smooth out the repaired areas to create a level surface.
By carefully assessing the condition of your existing tile and properly preparing the surface, you can create the ideal foundation for installing laminate flooring. This will help ensure a beautiful and durable finished result that enhances the overall aesthetics of your space.
| Benefits of Assessing Existing Tile | |
|---|---|
| 1 | Ensures a stable and secure base for the laminate flooring. |
| 2 | Prevents issues such as cracking, warping, or buckling of the laminate due to an unstable tile surface. |
| 3 | Helps avoid potential moisture-related problems in the future. |
| 4 | Creates a level and aesthetically pleasing result. |
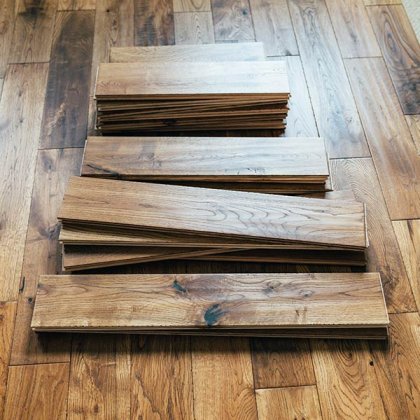
Gathering the Necessary Tools and Materials
Before you begin the installation process, it's essential to gather all the necessary tools and materials for a successful laminate flooring project. Having everything ready ensures a smooth and efficient installation process. Below is a step-by-step guide to help you gather all the essentials:
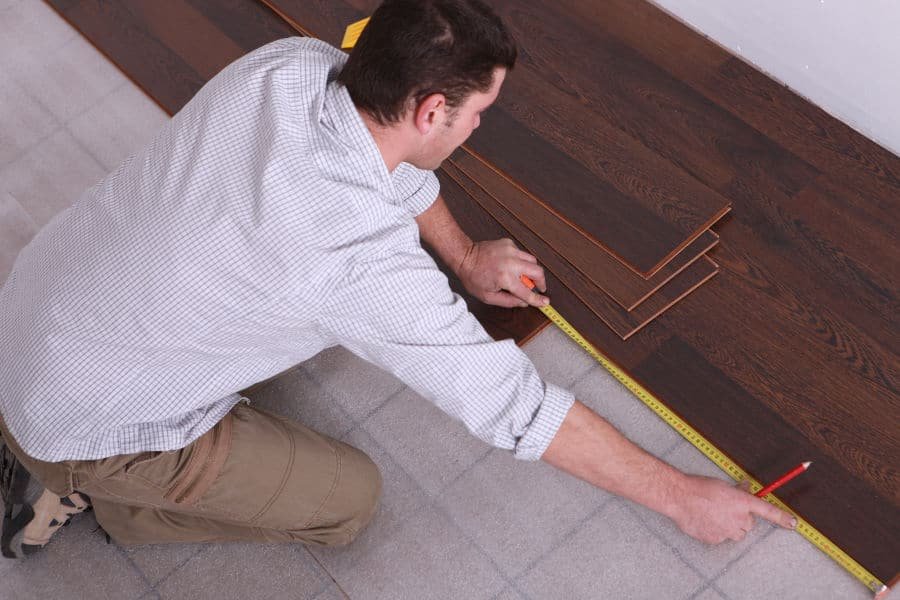
- Measuring Tools: Measure and mark the dimensions of the area where you plan to install the laminate flooring. You'll need a tape measure, a chalk line, and a carpenter's square.
- Safety Equipment: Safety should always be a top priority during any DIY project. Be sure to have safety goggles, ear protection, and a dust mask to protect yourself.
- Underlayment: Purchase the appropriate underlayment for your specific laminate flooring. This can include foam, cork, or rubber underlayment.
- Laminate Flooring: Choose the laminate flooring that suits your style and budget. Measure the square footage of the area to determine how much flooring you'll need.
- Sawing Tools: Depending on the type of laminate flooring you choose, you may need a circular saw, jigsaw, or miter saw for precision cutting.
- Installation Accessories: Stock up on installation accessories such as spacers, tapping blocks, a pull bar, and a rubber mallet to ensure proper installation and alignment.
- Adhesive and Sealant: If required by the manufacturer, make sure to purchase the recommended adhesive or sealant for your laminate flooring.
By having these tools and materials readily available, you'll be prepared to start your laminate flooring installation with confidence. Don't forget to refer to the manufacturer's instructions and safety guidelines throughout the process for optimal results.
| Tool/Material | Description |
|---|---|
| Measuring Tools | Tape measure, chalk line, and carpenter's square to accurately measure and mark the installation area. |
| Safety Equipment | Safety goggles, ear protection, and a dust mask to protect yourself during the installation process. |
| Underlayment | Foam, cork, or rubber underlayment to provide cushioning and moisture protection for the laminate flooring. |
| Laminate Flooring | Choose the desired laminate flooring style and purchase the appropriate amount based on the square footage of the installation area. |
| Sawing Tools | Circular saw, jigsaw, or miter saw for precise cutting of the laminate flooring planks. |
| Installation Accessories | Spacers, tapping blocks, pull bar, and rubber mallet to assist with the installation and alignment of the laminate flooring. |
| Adhesive and Sealant | If required by the manufacturer, purchase the recommended adhesive or sealant for securing the laminate flooring. |
Preparing the Tile Surface
Before you can install laminate flooring on top of tile, it's important to properly prepare the tile surface. This step is crucial to ensure a seamless transition and a long-lasting result. Here are the essential steps to follow:
- Clean the tile: Start by thoroughly cleaning the tile surface using a mild cleaner and a sponge or mop. Remove any dirt, dust, or residue to create a clean and smooth base.
- Level the surface: Use a leveling compound to fix any uneven areas on the tile surface. Apply the compound according to the manufacturer's instructions and ensure that the entire surface is level and flat.
- Smooth out grout lines: If your existing tile has noticeable grout lines, it's important to smooth them out to create an even surface. Apply a grout leveling compound to fill in the gaps and create a seamless base for the laminate flooring.
- Prime the tile: To enhance the adhesion of the laminate flooring, apply a primer specifically designed for tile surfaces. Follow the manufacturer's instructions and allow the primer to dry completely before proceeding.
Following these steps will ensure that your tile surface is clean, level, and primed for the installation of laminate flooring. By properly preparing the surface, you'll achieve a durable and visually pleasing result that will transform your space.
Remember, proper preparation is key when installing laminate flooring on top of tile. Taking the time to clean, level, and prime the tile surface will ensure a smooth installation process and a beautiful finished product.
| Benefits of Preparing the Tile Surface | How to Achieve Them |
|---|---|
| 1. Increased durability of the laminate flooring | - Cleaning the tile surface removes dirt and debris that could cause unevenness or damage to the underlayment. - Leveling the surface ensures proper weight distribution and prevents premature wear and tear on the laminate flooring. - Smoothing out grout lines prevents them from showing through the laminate flooring, resulting in a cleaner and more polished look. - Priming the tile enhances the adhesive properties and ensures a secure bond between the laminate flooring and the tile surface. |
| 2. Improved aesthetics of the finished flooring | - Cleaning the tile surface removes stains or discoloration, creating a clean and fresh canvas for the laminate flooring. - Leveling the surface eliminates any visible imperfections and creates a smooth and even base for the laminate flooring. - Smoothing out grout lines minimizes the appearance of lines or gaps, creating a seamless and cohesive look. - Priming the tile enhances the color and vibrancy of the laminate flooring, resulting in a more visually appealing finished product. |
| 3. Longevity and stability of the laminate flooring | - Cleaning the tile surface removes any residue that could compromise the adhesion of the laminate flooring, ensuring a secure and stable installation. - Leveling the surface prevents sagging or sinking of the laminate flooring, preserving its structural integrity and preventing potential damage. - Smoothing out grout lines eliminates weak points that could lead to cracked or damaged laminate flooring in the future. - Priming the tile creates a strong bond between the tile surface and the laminate flooring, reducing the risk of shifting or movement over time. |
Installing Underlayment and Vapor Barrier
When it comes to laminate flooring installation, underlayment and a vapor barrier are essential elements that should not be overlooked. They serve crucial roles in protecting your new laminate flooring and ensuring its longevity. In this section, we will guide you through the process of selecting and installing the right underlayment and vapor barrier, providing you with expert tips and tricks along the way to make your installation process seamless and successful.
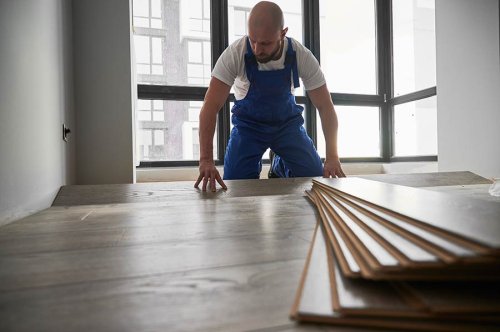
Laying the Laminate Flooring
Once you have prepared the surface and gathered all the necessary tools and materials, it's time to lay down the laminate flooring. This step-by-step guide will ensure that you achieve a professional finish with proper alignment, cutting, and installation techniques.
- Start by measuring and planning: Measure the length and width of the room to determine the amount of laminate flooring you will need. Consider the layout and pattern of the planks for a visually appealing result.
- Prepare the first row: Carefully remove the tongue on the long side of the first row of laminate planks using a utility knife. Place spacers along the wall to allow room for expansion. Remember to leave a ⅜-inch gap for proper flooring movement.
- Begin laying the first row: Insert the trimmed plank with the cut side facing the wall, ensuring it is properly aligned with the spacers. Connect the short end of the second plank to the first plank by angling it and gently pressing it down. Once connected, use a tapping block and hammer to secure the joint.
- Continue with the subsequent rows: Slide the second row of planks against the first row, using a tapping block to ensure a tight fit. Connect the short ends of the planks by angling and pressing them together. Repeat this process for each row, using a pull bar and hammer to snugly fit the planks together.
- Trimming and cutting: When you reach the last row, you may need to cut the planks to fit. Measure the remaining space and trim the planks accordingly, leaving a ⅜-inch gap between the wall and the flooring for expansion.
- Installing around obstacles: If you encounter obstacles like doorways or vents, carefully measure and cut the planks to fit around them. Ensure proper alignment and use a jigsaw or handsaw for precise cuts.
Remember to periodically check the alignment and the levelness of the laminate flooring during the installation process. Once all the planks are in place, remove the spacers and install the baseboards or trim to cover the expansion gap.
Pro Tip: Always refer to the manufacturer's instructions for specific guidelines and recommendations regarding the installation of their laminate flooring product.
Now that you've successfully laid down the laminate flooring, you're one step closer to transforming the look of your space. The next section will cover the finishing touches and trim work, so stay tuned to add those final details for a polished and professional appearance.
| Laminate Flooring Installation Tips |
|---|
| Measure the length and width of the room to determine the required amount of laminate flooring. |
| Leave a ⅜-inch gap around the perimeter of the room for proper expansion. |
| Use spacers along the walls to maintain consistent spacing between the flooring and the walls. |
| Trim the first row of planks to remove the tongue and ensure a proper fit. |
| Connect the planks by angling and pressing them together, using a tapping block and hammer to secure the joints. |
| Use a pull bar and hammer to snugly fit the planks together in each row. |
| Measure and trim planks to fit around obstacles such as doorways or vents. |
| Regularly check the alignment and levelness of the laminate flooring during installation. |
| Refer to the manufacturer's instructions for specific guidelines and recommendations. |
Finishing Touches and Trim Work
As you near the completion of your laminate flooring installation, it's time to add the finishing touches and trim work. These final steps will not only enhance the overall appearance of your new flooring but also ensure a secure and polished finish. Here are some essential tips and tricks to guide you through this crucial phase:
- Securing the Flooring: Once the laminate planks are in place, make sure to secure them by using finishing nails or adhesive. This will prevent any movement or shifting over time, ensuring a long-lasting installation.
- Adding Transitions: To achieve a seamless transition between your laminate flooring and other floor surfaces, such as carpet or tile, you'll need to install transition strips. These strips come in various materials and styles to match your decor. Measure and cut the strips to fit the doorways or entry points and secure them using adhesive or screws.
- Creating Trim Work: To give your laminate flooring a professional and polished look, install baseboards or quarter-round moldings along the edges of the room. These trim pieces will not only hide the expansion gap but also provide a decorative and finished touch to your installation. Measure and cut the trim pieces to the desired length and secure them using a nail gun or adhesive.
- Sealing the Joints: In high-moisture areas, such as bathrooms or kitchens, it is essential to seal the joints between laminate planks to prevent water penetration. Use a silicone-based caulk to seal the gaps, ensuring a watertight and protected flooring surface.
By following these laminate flooring installation tips for finishing touches and trim work, you will achieve a professional-looking outcome that enhances the overall aesthetics of your space. So take your time, pay attention to detail, and enjoy the satisfying feeling of completing a successful DIY project.
| TIP | Make sure to use the correct tools for securing trim pieces, such as a miter saw for accurate angle cuts and a nail gun for efficient installation. |
|---|
Maintenance and Care for Laminate Flooring
Once you've updated your space with beautiful laminate flooring, it's important to know how to properly maintain and care for it to ensure its long-lasting beauty. Laminate flooring offers both durability and style, but it still requires attention to keep it looking its best over the years. In this section, we will provide you with essential maintenance tips and tricks to keep your laminate flooring in great condition.
Cleaning Tips for Laminate Flooring
Regular cleaning is key to maintaining the appearance of your laminate flooring. Here are some tips to keep in mind:
- Sweep or vacuum: Use a soft-bristle broom or a vacuum cleaner with a brush attachment to remove loose dirt and dust from the surface of the floor. Avoid using vacuum cleaners with beater bars, as they can cause scratches.
- Mop with care: Damp-mop your laminate flooring using a well-wrung mop or microfiber cloth. Avoid using excessive water, as it can seep into the joints and cause damage.
- Use the right cleaning products: Choose a laminate floor cleaner that is specifically designed for laminate flooring. Avoid using harsh chemicals, abrasive cleaners, or wax-based products, as they can dull the finish and leave residue.
- Wipe up spills promptly: Accidents happen, but it's important to clean up any spills or liquids immediately to prevent them from seeping into the laminate and causing damage.
Tips to Prevent Damage
While laminate flooring is durable, taking a few precautions can help prevent unnecessary damage. Here are some tips:
- Use furniture pads: Place felt or rubber pads under the legs of furniture to prevent scratches and dents when moving or rearranging items.
- Avoid high heels or sharp objects: Discourage walking on the laminate flooring with high heels or allowing sharp objects to come into contact with the surface, as they can cause scratches or indentations.
- Protect the floor from moisture: Place mats or rugs near entryways and in high-traffic areas to trap dirt, moisture, and debris. Wipe your feet or remove shoes before walking on the laminate flooring.
Remember, prevention is key when it comes to maintaining your laminate flooring. By following these cleaning and prevention tips, you can extend the lifespan of your flooring and keep it looking its best for years to come.
Dealing with Stubborn Stains and Damage
If you encounter stubborn stains or minor damage on your laminate flooring, don't fret. There are solutions available:
- Spot clean stains: If you have a stubborn stain, such as wine or ink, apply a small amount of laminate floor cleaner directly to the stain and gently scrub with a soft cloth or sponge. Rinse with clean water and dry the area thoroughly.
- Repair minor damage: For minor scratches or chips, you can use a laminate floor repair kit to fix the imperfections. Simply follow the instructions provided with the kit and carefully blend the repair material into the damaged area.
It's important to note that severe damage, such as large scratches or water damage, may require professional intervention or even replacement of the affected boards. Consult with a flooring specialist if you encounter significant issues.
By following these maintenance tips and taking proper care of your laminate flooring, you can enjoy its beauty, durability, and functionality for many years to come. With regular cleaning and preventive measures, you can keep your laminate flooring looking as good as new and continue to update your space with confidence.
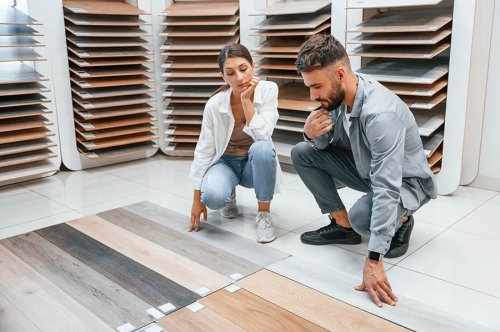
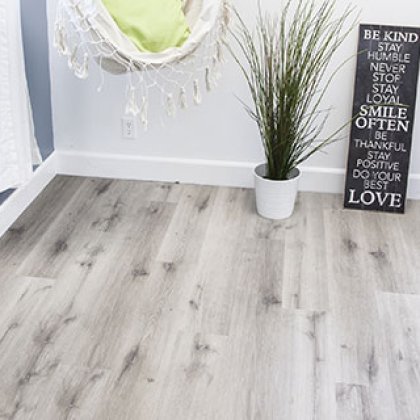
Cost-Effective Laminate Flooring Solutions
Are you looking for a cost-effective way to update your space? Look no further than laminate flooring. With its affordability and versatility, laminate flooring provides a budget-friendly solution for transforming your home. In this section, we will explore different laminate flooring options that offer both style and savings.
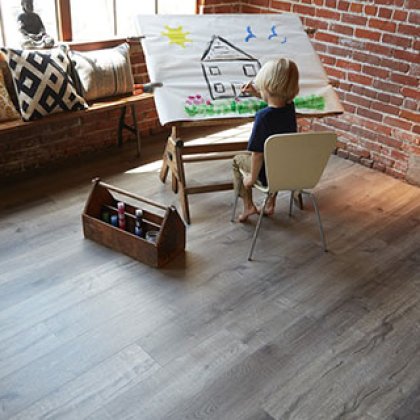
1. Traditional Laminate
Traditional laminate flooring is an excellent choice for those seeking a cost-effective solution without compromising on quality. This type of laminate mimics the appearance of natural materials like hardwood or stone, giving you the desired aesthetic at a fraction of the price. Plus, it's easy to install and maintain, making it a popular choice for DIY enthusiasts.
2. Waterproof Laminate
If you're looking for a durable and cost-effective flooring option for high-moisture areas such as bathrooms or kitchens, waterproof laminate is the way to go. These laminates are specially designed to resist water damage, making them perfect for areas prone to spills and splashes. You can enjoy the beauty of hardwood or stone without worrying about warping or swelling.
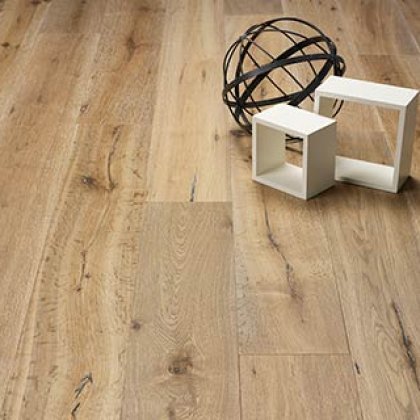
3. Wide Plank Laminate
Add a touch of elegance to your space with wide plank laminate flooring. With wider and longer planks, this style creates a sense of spaciousness and sophistication. Wide plank laminate is not only cost-effective but also offers timeless beauty and a luxurious feel. It's a perfect choice for those who want to make a statement with their flooring.
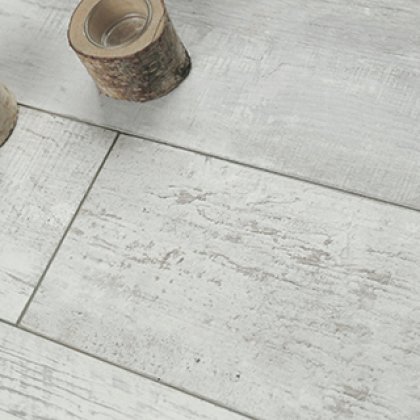
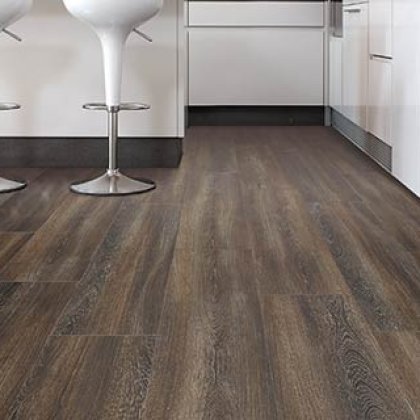
4. Distressed Laminate
Looking for a rustic or vintage look? Distressed laminate flooring is the answer. With its textured surface and worn appearance, this type of laminate adds character and charm to any room. It's an affordable way to achieve the sought-after reclaimed wood look without the high cost and maintenance.
When it comes to cost-effective laminate flooring solutions, these options are just the tip of the iceberg. With a wide range of styles, colors, and finishes available, laminate flooring gives you the freedom to create a look that suits your taste and budget. Don't let cost be a barrier to achieving the beautiful flooring you desire.
Conclusion
In conclusion, installing laminate flooring over existing tiles offers a cost-effective and stylish solution for upgrading your home. By following our step-by-step guide and utilizing expert tips, you can confidently embark on this DIY project and transform the look and feel of your space.
Laminate flooring not only provides durability but also a wide range of style options to suit your personal preferences. Whether you're looking for a modern, rustic, or classic aesthetic, laminate flooring can help you achieve the desired look without breaking the bank.
Throughout the installation process, it is important to assess the condition of your existing tiles and properly prepare the surface. By ensuring a clean, level, and primed tile surface, you can create a seamless transition and achieve a professional finish.
Maintaining and caring for your laminate flooring is key to preserving its beauty for years to come. With our essential maintenance tips, you can easily keep your laminate flooring looking its best, ensuring that your investment continues to enhance your home's appeal and value.
FAQ
Can laminate flooring be installed over existing tiles?
Yes, laminate flooring can be installed over existing tiles. However, it's important to assess the condition of the tiles and ensure they are suitable for installation. Cleaning, leveling, and priming the tile surface are essential steps in preparing for laminate flooring installation.
Why should I choose laminate flooring over traditional tile?
Laminate flooring offers various benefits compared to traditional tile. It is durable, affordable, and available in a wide range of styles and designs. Laminate can mimic the appearance of hardwood or stone, providing a cost-effective option for updating your space.
What are the best practices for laying laminate flooring over tile?
Before installing laminate flooring over tile, make sure the tile is in good condition and properly prepared. Clean the surface, level any uneven areas, and prime the tile before laying the laminate. This will ensure a seamless transition and a long-lasting installation.
What tools and materials do I need for installing laminate flooring over tile?
To install laminate flooring over tile, you will need tools such as a circular saw, measuring tape, spacers, and a tapping block. Materials required include laminate flooring, underlayment, and a vapor barrier. It's important to gather all the necessary tools and materials before starting the installation.
How do I prepare the tile surface for laminate flooring installation?
Preparing the tile surface involves cleaning it thoroughly, ensuring it is level, and applying a primer. This helps create a smooth and even base for the laminate flooring. It's essential to remove any dirt, debris, or adhesive residue from the tiles before proceeding with the installation.
Should I install underlayment and a vapor barrier under laminate flooring?
Yes, it is recommended to install underlayment and a vapor barrier before laying laminate flooring. Underlayment provides cushioning, noise reduction, and helps with moisture resistance. A vapor barrier protects the laminate from moisture beneath the surface, prolonging its lifespan.
What is the process for laying laminate flooring?
The process involves measuring and cutting the laminate boards to fit the room, laying them down row by row, and securing them using the correct installation technique. It's important to follow a step-by-step guide to ensure proper alignment and achieve a professional finish.
How do I add the finishing touches and trim work after installing the laminate flooring?
Finishing touches and trim work give the laminate flooring a polished look. This includes securing the flooring with baseboards, adding transitions between rooms or different flooring materials, and filling any gaps or spaces. Proper trim work helps create a seamless and visually appealing result.
What maintenance and care does laminate flooring require?
Laminate flooring is relatively low-maintenance. It should be regularly swept or vacuumed to remove dirt and debris. Spills should be cleaned promptly, and protective pads or felt should be used on furniture legs. Avoid excessive moisture and use recommended cleaning products for