


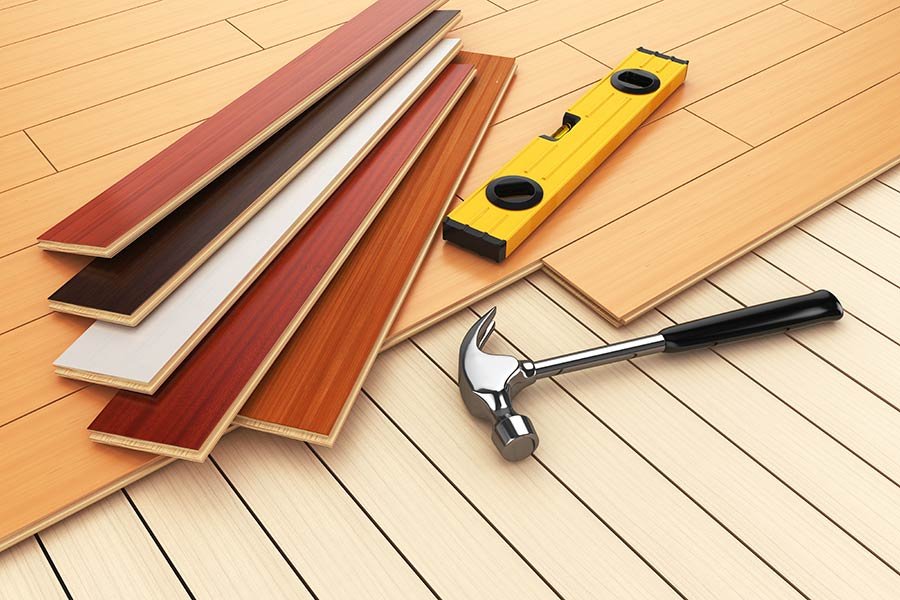
Essential Tools for Perfect Laminate Flooring Installation
Why settle for less when you can easily master the art of laminate flooring installation? Knowing the right tools can turn a daunting task into a smooth, DIY project. From the essential underlayment to the precision of cutting tools, each plays a pivotal role in achieving that flawless finish. Whether it's your first time laying down floors or you're aiming to brush up on your skills, understanding the key laminate flooring installation tools is your first step towards transformation. Dive into the world of flooring where efficiency meets excellence.
Key Takeaways
- You need specific tools for installing laminate flooring, like a tapping block, spacers, and a pull bar.
- Preparing the floor is crucial; it must be clean, dry, and level before you start.
- Learn the right cutting and trimming techniques to fit the planks perfectly in your space.
- Don't skip the underlayment; it's key for a smooth installation and helps with moisture and sound.
- Starting with the first row correctly sets the tone for your entire project.
- Staggering planks is not just for looks; it also makes your floor stronger.
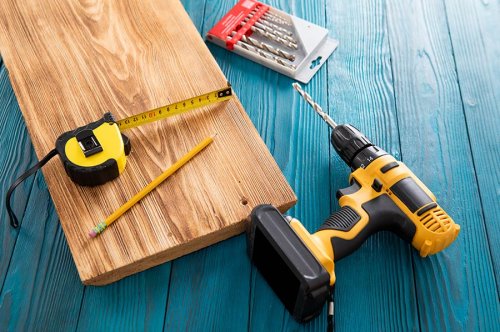
Essential Tools for Installation
Tape Measure
A tape measure is key. You need it to get the right size of your room. It helps you know how much flooring you need.
Measure twice, cut once. This rule makes sure you don't waste materials.
Rubber Mallet
A rubber mallet is a must. It helps you fit the planks together without damage.
It's gentle but effective. With it, you can make sure each piece locks in tight.
Pull Bar
The pull bar works wonders in tight spaces. Sometimes, your hands just can't reach.
It's perfect for the last row or when working near walls. This tool makes sure every plank fits snugly.
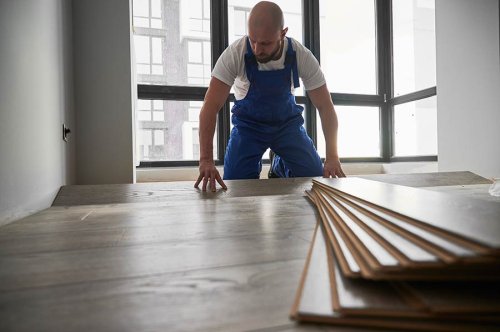
Preparing the Floor
Clean Subfloor
Before laying down laminate, cleaning is crucial. Remove all dust and debris. This step ensures nothing interferes with the installation.
A clean base helps the laminate fit better. It prevents bumps or gaps later on.
Check Levelness
Next, check if the floor is level. Use a spirit level for accuracy. Uneven spots can cause problems.
If you find any, fix them right away. You might need to fill low areas with leveling compound. High spots may need sanding down.
Ensuring a flat surface is key for a smooth finish.
Ensure Dryness
Lastly, make sure the floor is dry. Moisture can ruin laminate flooring quickly.
Use a moisture meter to check. If it's too high, you may need a dehumidifier. Preventing moisture damage is vital.
A dry subfloor protects your investment in the long run.
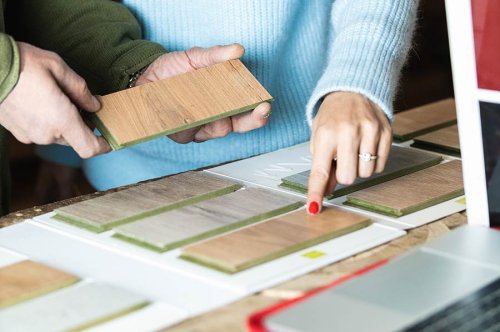
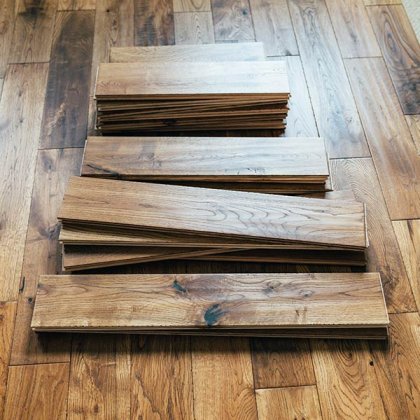
Cutting and Trimming Techniques
Mark Planks
Marking your laminate planks correctly is crucial. Use a pencil for clarity. Measure twice to be sure. This helps avoid mistakes.
A straight edge guides the marking. It ensures straight lines. Always double-check your measurements.
Saw Selection
For cutting, choose between a jigsaw and a circular saw. A jigsaw is best for intricate cuts. It works well for curves.
A circular saw guarantees straight, fast cuts. It's ideal for long, straight lines. Ensure the blade is sharp for clean cuts.
Sand Edges
After cutting, sand the edges of the planks. This prevents splinters. Use fine-grit sandpaper for smoothness.
Sanding also helps in fitting the planks together better. It removes tiny imperfections. Always sand in the direction of the grain.
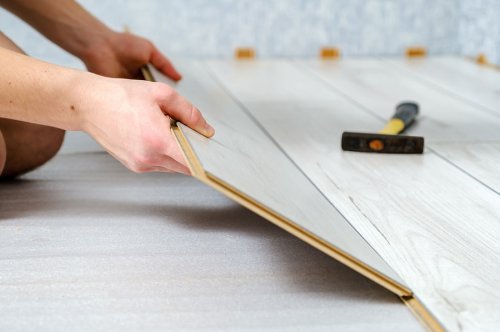
Underlayment and First Row Setup
Roll Out
Roll out the underlayment carefully across the floor. Make sure it is flat and smooth. This step is crucial for a stable base.
The underlayment acts as a cushion. It also reduces noise. Ensure there are no wrinkles or folds.
Align Planks
Place the first row of planks next to the wall. Use spacers between planks and walls. This creates an expansion gap.
This gap prevents buckling. It allows the floor to expand and contract. Spacers ensure this gap is even.
Secure Row
Securing the first row is important. It prevents shifting during installation.
Start by placing the edge of a plank into the groove of another. Tap gently to secure them together. Repeat this process until the row is complete.
A stable first row sets the tone for the rest of your project. After cutting and trimming, as discussed before, ensuring your first row is perfectly aligned and secured will make the subsequent rows easier to manage.
Staggering and Laying Planks
Stagger Seams
Staggering seams is key. It makes floors look real and flowing. Don't line up the seams. It's not good. Make sure they're off by a few inches every row.
Start a new row with a different sized plank. This helps with the stagger. Keep an eye on the pattern. You want it random. No repeating looks.
Click-Lock System
Planks snap together easily. This system is quick and secure. Line them up at an angle first. Then, press down until you hear a click. That means they're locked.
etimes, they don't click right away. Don't force them. Check the edges for dirt or damage first.
Check Alignment
After each row, step back and look. The rows should be straight. Use a long level to check if you're unsure.
If a row starts to drift, fix it right away. It's easier to correct one plank than a whole floor.
Final Remarks
You've got the scoop on laying down laminate flooring like a pro. From gathering your tools, prepping the floor, to laying those planks just right, you're all set. It's about making your space shine without breaking a sweat or the bank. Remember, the right cut and fit make all the difference. Now, it's your turn to take the floor—literally. Dive in, follow these steps, and watch your room transform. Need more tips or ready to tackle another project? Keep us bookmarked. Your next DIY success story starts here.
Ready to step up your home game? Don't just dream about that perfect floor—make it happen. Grab your tools, and let's get cracking. Your fabulous new floor awaits. And hey, if you hit a snag or want to show off your masterpiece, we're all ears. Share your journey, get inspired, and inspire others. Let's do this together.
Frequently Asked Questions
What tools do I need for laminate flooring installation?
You'll need a tape measure, utility knife, hammer, tapping block, spacers, and a pull bar. These tools help measure, cut, and fit planks accurately.
How should I prepare the floor before installing laminate?
Ensure the floor is clean, dry, and level. Remove any debris or old flooring, and check for moisture. Proper preparation prevents future issues.
Can you explain cutting and trimming laminate flooring?
Use a utility knife or saw for precise cuts. Measure twice, cut once. Always cut planks face down to avoid chipping.
What's the purpose of underlayment in laminate flooring?
Underlayment provides a smooth surface, reduces noise, and adds moisture protection. It's essential for durability and comfort.
How do I set up the first row of laminate planks?
Start from a corner, placing spacers between the wall and planks to allow for expansion. Ensure the first row is straight as it guides the rest.
What is the staggering process in laying laminate planks?
Staggering means offsetting the planks in each row to avoid aligning seams, which enhances stability and appearance. Aim for at least 12 inches between end joints in consecutive rows.
Why is it important to lay planks correctly?
Proper installation ensures your floor is even, aesthetically pleasing, and lasts longer. It prevents gaps, lifting, and potential damage.