


Waterproof Wonders: Techniques for Installing Water-Resistant Laminate
Waterproof Wonders: Techniques for Installing Water-Resistant Laminate
Welcome to our comprehensive guide on installing water-resistant laminate flooring. In this article, we will explore various techniques that can be used to protect your space from moisture while enhancing the overall appearance of your home. Whether you are a seasoned DIY enthusiast or a beginner, this step-by-step guide will help you level up your skills and achieve a flawless installation.
Key Takeaways:
- Learn techniques to install water-resistant laminate flooring
- Protect your space from moisture and water damage
- Enhance the overall appearance of your home
- Achieve a tight and seamless fit with insider tips and tricks
- Ensure proper waterproofing and moisture protection for longevity
Understanding Waterproof Laminate Flooring
Before we dive into the installation process, it's essential to understand the features and benefits of waterproof laminate flooring. This type of flooring offers a fantastic combination of durability, aesthetics, and water resistance. Here are some key factors to consider:
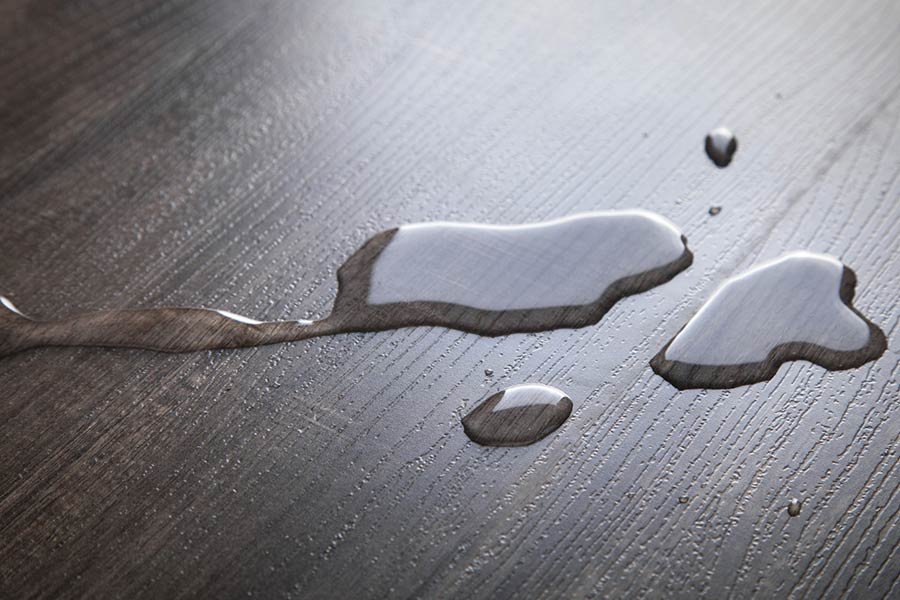
- Water Resistance: Waterproof laminate flooring is designed to handle spills, moisture, and high humidity environments. With an impenetrable top layer, it provides exceptional resistance to water damage, making it an ideal choice for bathrooms, kitchens, and basements.
- Durability: Unlike traditional laminate flooring, waterproof varieties are highly durable and resistant to scratches, impacts, and fading from UV exposure. This ensures that your flooring will maintain its pristine appearance even in high-traffic areas.
- Easy Maintenance: Waterproof laminate flooring is a breeze to clean and maintain. With its water-resistant properties, you can simply wipe away spills and messes without worrying about long-term damage. Regular sweeping or vacuuming helps remove dirt and debris to keep the floor looking its best.
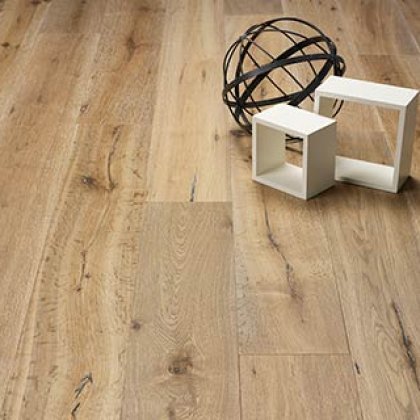
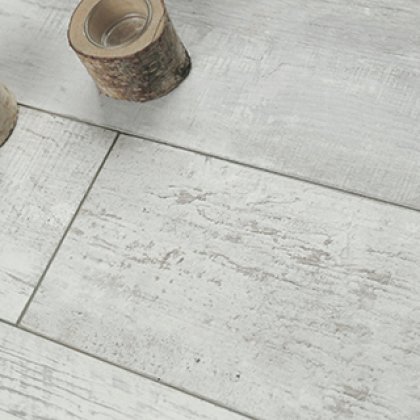
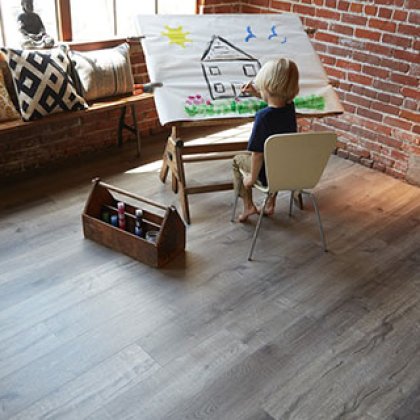
- Realistic Design: Today's waterproof laminate flooring options come in a wide range of designs, patterns, and textures that replicate the look and feel of natural hardwood, stone, or tile. This allows you to achieve the aesthetic you desire without sacrificing the practicality of waterproof flooring.
Now that you understand the benefits of waterproof laminate flooring, let's move on to some essential tips that will ensure a successful installation.
Best Practices for Installing Waterproof Laminate Flooring:
- Measure Twice, Cut Once: Before starting the installation process, be sure to measure the area accurately. This will help you determine the number of materials needed, reduce waste, and ensure a precise fit.
- Prepare the Subfloor: The success of your laminate flooring installation depends on a properly prepared subfloor. Make sure it is clean, dry, level, and free from any imperfections that could affect the flooring's stability.
- Follow Manufacturer Instructions: Each waterproof laminate flooring product may have specific installation instructions provided by the manufacturer. It's crucial to carefully read and follow these instructions to ensure a correct and durable installation.
- Allow for Expansion: Waterproof laminate flooring needs room to expand and contract with changes in temperature and humidity. Be sure to leave an appropriate expansion gap around the edges of the room and between flooring panels.
- Use Proper Tools: Using the right tools and equipment is essential for achieving a professional-looking installation. Make sure you have the necessary tools, such as a circular saw, tapping block, spacers, and a pull bar, to facilitate the installation process.
By following these laminate flooring installation tips and best practices for installing waterproof laminate flooring, you'll be well on your way to achieving a beautiful, durable, and water-resistant floor that will transform your space.
| Advantages of Waterproof Laminate Flooring | Water Resistance | Durability | Easy Maintenance | Realistic Design |
|---|---|---|---|---|
| Features | Impenetrable top layer prevents water damage | Highly durable and resistant to scratches and impacts | Easily wipe away spills and messes | Wide range of designs to mimic natural materials |
Preparing Your Subfloor for Installation
A crucial step in any flooring installation project is preparing the subfloor. It sets the foundation for a successful and durable installation of waterproof laminate flooring. By following these steps, you'll ensure that your subfloor is in perfect condition and ready to support your new flooring.
Step 1: Clean and Remove Debris
Start by thoroughly cleaning the subfloor to remove any debris, dust, or dirt. Use a broom or vacuum cleaner to sweep the surface, ensuring it is free from any loose particles that could interfere with the installation process.
Step 2: Check for Levelness
Using a level tool, check the levelness of your subfloor. It should be completely flat and even across the entire installation area. If you notice any uneven spots or bumps, you'll need to address them before proceeding with the installation. Sand down high spots and use a leveling compound to fill in low areas, ensuring a smooth surface. This step is crucial to prevent any gaps or unevenness in your laminate flooring.
Step 3: Assess Moisture Levels
Moisture can seep through the subfloor and damage your laminate flooring. To avoid this, it's important to assess the moisture levels before installation. Use a moisture meter to determine if your subfloor is within the acceptable range for laminate flooring. If the moisture levels are too high, you may need to install a moisture barrier or take additional measures to mitigate moisture.
Step 4: Repair Subfloor Damage
Inspect the subfloor for any signs of damage, such as rot or mold. If you notice any issues, it's crucial to address them before proceeding with the installation. Replace damaged sections or treat them accordingly to ensure a solid and stable subfloor.
Step 5: Acclimate the Laminate Flooring
Before installation, it's important to acclimate the laminate flooring to the environment where it will be installed. Leave the flooring materials in the room for a period of time, allowing them to adjust to the temperature and humidity levels. This will prevent any expansion or contraction of the planks after installation.
Step 6: Install Underlayment
Underlayment adds an extra layer of protection and helps with noise reduction. Install a suitable underlayment over the subfloor before laying the laminate flooring. Ensure the underlayment is properly aligned and covers the entire installation area.
| Advantages of Preparing Your Subfloor | Benefits of Proper Subfloor Preparation: |
|---|---|
| 1. Ensures a solid foundation for your laminate flooring | 1. Increases the longevity of your flooring |
| 2. Prevents moisture from damaging your flooring | 2. Minimizes the risk of warping or buckling |
| 3. Provides a level and even surface for installation | 3. Enhances the overall aesthetic of your space |
| 4. Reduces the chance of gaps or unevenness in the flooring | 4. Improves the acoustic properties of the floor |
By following these steps and taking the time to prepare your subfloor, you'll create a solid foundation for your waterproof laminate flooring. This will ensure a successful installation and a beautiful, long-lasting floor in your home.
Acclimating and Preparing Laminate Planks
Properly acclimating your laminate planks is a crucial step in ensuring a successful installation. By allowing the planks to adjust to the temperature and humidity of the installation area, you can minimize the risk of buckling or expansion. Follow our step-by-step guide below to properly acclimate and prepare your laminate planks for a flawless installation.
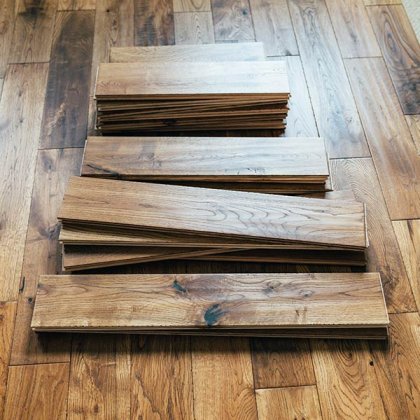
Step 1: Unpack and Inspect
Before acclimating the laminate planks, carefully unpack them and inspect each plank for any visible defects or damage. It's essential to address any issues before proceeding with the installation.
Step 2: Acclimate the Planks
Place the unpacked laminate planks in the room where they will be installed. Make sure to stack them neatly in a flat position, allowing for proper air circulation. This will enable the planks to gradually adjust to the temperature and humidity of the room. Refer to the manufacturer's guidelines for the recommended acclimation period, as it may vary depending on the specific product.
Step 3: Prepare the Subfloor
While the planks are acclimating, take this opportunity to prepare the subfloor. Ensure that the subfloor is clean, dry, and level. Remove any debris, dust, or dirt from the surface, and repair any imperfections or unevenness. A clean and level subfloor will provide a stable foundation for the laminate planks.
Step 4: Gather the Tools and Materials
Before installing the laminate planks, gather all the necessary tools and materials. These may include a measuring tape, spacers, a utility knife, a tapping block, a pull bar, and a rubber mallet. Having everything ready at hand will streamline the installation process.
Step 5: Trim the Door Jambs
If needed, trim the bottom of the door jambs to allow for the thickness of the laminate planks. Use a handsaw or a jamb saw to remove the excess material. This will ensure a seamless installation without any gaps or obstructions.
Step 6: Follow the Manufacturer's Instructions
Every laminate flooring product is unique, so it's vital to carefully read and follow the manufacturer's installation instructions. These instructions will provide specific guidelines on how to prepare and install the laminate planks effectively. Adhering to these guidelines will help you achieve the best results and maintain the warranty.
By acclimating and preparing your laminate planks properly, you'll create a solid foundation for a successful installation. Now that the planks are ready, you can move on to the next step in our guide: choosing the right installation method.
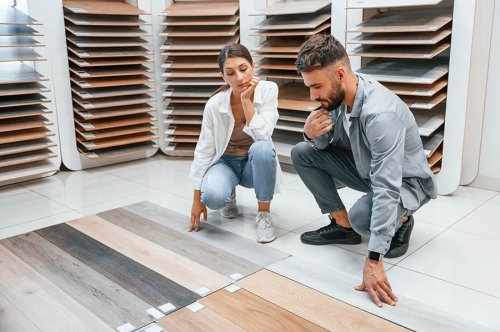
Choosing the Right Installation Method
When it comes to installing waterproof laminate flooring, choosing the right installation method is crucial for a successful and long-lasting result. With various options available, it's important to consider the pros and cons of each method to ensure the best fit for your specific needs. Let's explore the different installation methods and provide expert recommendations to help you make an informed decision.
Floating Installation
The floating installation method is a popular choice for waterproof laminate flooring. With this method, the planks are not attached to the subfloor but instead interlock with each other, creating a stable and secure floor. This method allows for easy installation and flexibility, as the planks can be replaced or repositioned if needed. However, it's crucial to remember that proper moisture barrier installation is essential for water resistance.
Glue-Down Installation
Another option for installing waterproof laminate flooring is the glue-down method. With this method, the planks are adhered directly to the subfloor using a special adhesive. This creates a strong and permanent bond between the planks and the subfloor, ensuring stability and preventing any movement. Glue-down installation is known for its durability and resistance to moisture. However, it requires precision and careful planning to ensure a smooth and seamless finish.
Click and Lock Installation
The click and lock installation method, also known as the angle-angle method, is a user-friendly option for DIY enthusiasts. With this method, the planks are designed with interlocking mechanisms on the edges, allowing them to be easily connected and secured in place. Click and lock installation provides a fast and efficient process, making it a popular choice for those looking for a hassle-free installation. However, it's essential to follow the manufacturer's instructions for proper locking and ensure a tight fit to maintain the floor's water resistance.
Expert Recommendations
When choosing the installation method for your waterproof laminate flooring, it's important to consider your specific circumstances and preferences. If you're unsure which method to choose, consulting with a flooring professional can provide valuable insights and guidance. They can assess your space, consider factors such as subfloor condition and moisture levels, and recommend the best installation method for optimal results. Remember, proper installation is key to achieving a beautiful, water-resistant floor that will stand the test of time.
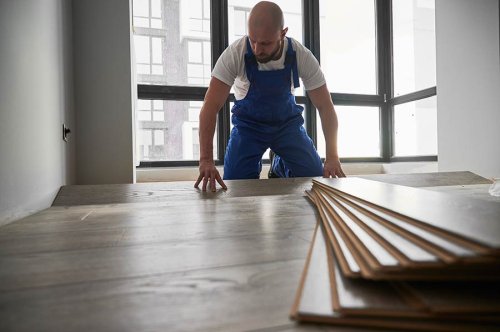
Step-by-Step Installation Guide
Ready to transform your space with beautiful waterproof laminate flooring? Follow our step-by-step guide for a seamless installation process that will have your floors looking like a professional job in no time. Here's how to get started:
1. Prepare the Subfloor
Before you begin, make sure your subfloor is clean, level, and free from moisture. Remove any debris or adhesive residues and repair any imperfections. If necessary, use a moisture barrier or underlayment to protect against moisture penetration.
2. Acclimate the Laminate Planks
Allow your laminate planks to acclimate to the room's temperature and humidity for at least 48 hours before installation. This will ensure that the planks adjust to the environment and minimize the risk of expansion or contraction.
3. Lay the Underlayment
Install the underlayment over the subfloor to provide a smooth and cushioned surface for your laminate flooring. Make sure to follow the manufacturer's instructions for proper installation.
4. Start the First Row
Begin by laying the first row of laminate planks along the longest wall, ensuring a 1/4-inch gap between the planks and the wall for expansion. Use spacers to maintain consistent spacing throughout the installation process.
5. Install the Remaining Rows
Continue installing the laminate planks row by row, locking each plank into place with a gentle tapping motion. Stagger the joints between planks to create a more natural and visually appealing look.
6. Trim and Fit the Last Row
Measure and cut the last row of planks to fit, taking into account any irregularities in the wall. Use a table saw or jigsaw to make clean and precise cuts. Don't forget to leave the proper expansion gap.
7. Install the Baseboards
After the laminate flooring is fully installed, install the baseboards to cover the expansion gap and create a finished look. Use a miter saw to achieve clean and professional-looking cuts.
8. Finishing Touches
Once the baseboards are in place, inspect the entire floor for any loose planks or visible gaps. Make sure all transitions and corners are snugly fitted. Clean the laminate flooring with a damp cloth or manufacturer-recommended cleaning solution to remove any installation residue.
Congratulations! You've successfully installed your waterproof laminate flooring. Sit back, relax, and enjoy your beautiful, water-resistant floors!
Ensuring Proper Waterproofing and Moisture Protection
When it comes to installing waterproof laminate flooring, proper waterproofing and moisture protection are vital for its longevity and durability. Taking the necessary precautions will ensure that your flooring stays water-resistant and protected from potential damage.
Here are some best practices and techniques to help you safeguard your laminate flooring:
- Choose a waterproof laminate flooring: Start off on the right foot by selecting a high-quality, waterproof laminate flooring product. Look for options that have been specifically designed to resist moisture and provide long-lasting protection.
- Seal all edges: During installation, make sure to seal all the edges of your laminate flooring. Apply a waterproof sealant or adhesive to create a barrier that prevents water from seeping into the gaps between the planks.
- Utilize proper underlayment: Installing an appropriate underlayment beneath your laminate flooring can add an extra layer of moisture protection. Choose an underlayment that has waterproof properties or incorporates a vapor barrier to help prevent moisture from penetrating the floor.
- Securely lock the planks: Ensure that each plank is securely locked into place during installation. A tight fit will minimize the risk of water seepage between the planks and protect the subfloor from moisture infiltration.
- Maintain proper gaps: Leave a small expansion gap around the perimeter of the room and near fixed objects, such as walls and cabinets. These gaps accommodate natural expansion and contraction and prevent the flooring from buckling or warping due to moisture-related issues.
- Regularly inspect for damage: Keep an eye out for any signs of damage or wear on your laminate flooring. Address any issues promptly to minimize the risk of moisture absorption or further damage.
By following these best practices, you can ensure that your waterproof laminate flooring remains resilient against water damage and maintains its aesthetic appeal for years to come.
Proper waterproofing and moisture protection are key to preserving the integrity of your laminate flooring. Remember, prevention is the best way to avoid costly repairs or replacements in the future.
| Best Practices for Waterproof Laminate Flooring Installation | Benefits |
|---|---|
| Choose a waterproof laminate flooring | Enhanced resistance to water damage |
| Seal all edges | Prevents water from seeping into gaps |
| Utilize proper underlayment | Adds an extra layer of moisture protection |
| Securely lock the planks | Minimizes risk of water seepage |
| Maintain proper gaps | Prevents buckling or warping due to moisture |
| Regularly inspect for damage | Promptly addresses issues to prevent further damage |
Finishing Touches and Floor Care Tips
Congratulations on successfully installing your waterproof laminate flooring! Now that your new floors are in place, it's important to pay attention to the finishing touches and ongoing maintenance. These small details will not only enhance the overall look of your flooring but also help preserve its water-resistant qualities for years to come. Here are some essential floor care tips for your laminate floors:
1. Regular Cleaning
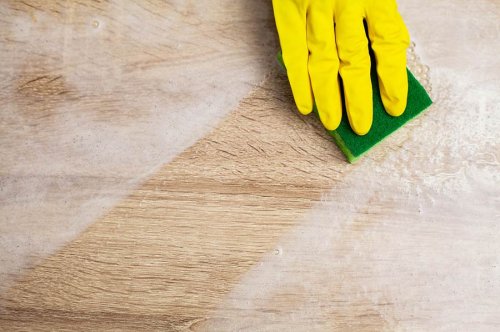
To keep your waterproof laminate flooring looking its best, it's crucial to establish a regular cleaning routine. Sweep or vacuum the floors to remove dust, dirt, and debris. For deeper cleaning, use a damp mop with a mild laminate floor cleaner to maintain its water-resistant properties. Avoid using excessive water or harsh cleaning products, as they can damage the flooring.
2. Protecting Against Scratches
Laminate flooring is durable, but it's still important to take precautions to prevent scratches. Place felt pads on the bottom of furniture legs to avoid scratching the surface when moving them. Using floor protectors or rugs in high-traffic areas can also help protect your laminate from wear and tear.
3. Wiping Up Spills Immediately
While waterproof laminate flooring is designed to withstand moisture, it's essential to clean up spills promptly to prevent any potential damage. Use a soft, absorbent cloth or paper towel to blot up any liquid spills immediately. Avoid letting spills sit on the floor for prolonged periods, as it can seep into the joints and cause swelling or warping.
4. Avoiding Excessive Sun Exposure
Direct, prolonged exposure to sunlight can cause laminate flooring to fade and lose its luster over time. Consider using window coverings or shades to protect your floors from excessive UV rays. If you have large windows, you might also rearrange furniture periodically to ensure even exposure.
5. Protecting Against Moisture
While waterproof laminate flooring is designed to be resistant to moisture, it's still essential to take precautions to prevent excessive water damage. Wipe up spilled liquids immediately, especially in areas prone to moisture, such as kitchens and bathrooms. Place mats or rugs near entryways to trap excess water from shoes and prevent it from seeping into the flooring.
6. Professional Inspections
Periodically, consider having your waterproof laminate flooring professionally inspected. An expert can help identify any potential issues, such as loose boards or damaged seals, before they become major problems. Regular inspections can ensure the longevity of your floors and help you address any concerns promptly.
By following these floor care tips, you can maintain the beauty and functionality of your waterproof laminate flooring for years to come. Remember to establish a regular cleaning routine, protect against scratches and moisture, and seek professional inspections when necessary. With proper care and attention, your laminate floors will continue to impress with their water-resistant qualities and stunning appearance.
Troubleshooting Common Installation Issues
While installing water-resistant laminate flooring, you may encounter some common installation issues. Don't worry! We've got you covered with expert troubleshooting tips to help you overcome these challenges and ensure a successful flooring installation.
- Uneven Subfloor: If your subfloor is not level, it can cause issues with the installation. Before proceeding, inspect your subfloor for any uneven areas. Use a leveling compound to smooth out any imperfections and create a flat surface for your laminate flooring.
- Gaps between Planks: Gaps between laminate planks can occur due to improper fitting or expansion and contraction of the flooring. If you notice gaps, gently tap the planks together using a tapping block and a mallet. Applying a small amount of adhesive in the gaps can also help secure the planks.
- Peaking: Peaking happens when two adjacent laminate planks push against each other and create a noticeable peak or ridge. If you experience peaking, remove the affected planks and reinstall them, ensuring proper spacing and alignment. Use a pull bar to gently tap the planks back into place.
- Squeaky Floors: Squeaky floors can be caused by movement between the subfloor and laminate planks. To fix squeaks, locate the source of the movement and insert shims between the subfloor and floor joists. Secure the laminate planks to the subfloor using finishing nails or screws, removing any existing squeaks.
- Moisture Damage: If moisture damage occurs during or after installation, it's crucial to address it promptly. Identify the source of the moisture and fix any leaks or issues. Replace damaged sections of laminate flooring and ensure proper moisture protection to prevent further damage.
By following these troubleshooting tips, you'll be able to overcome common installation issues and achieve a flawless installation of your water-resistant laminate flooring. Don't hesitate to seek professional assistance if needed, as their expertise can help ensure the best outcome for your project.
Conclusion
Congratulations on completing our comprehensive laminate flooring installation tutorial! By following the step-by-step guide and incorporating the best practices outlined in this article, you are well-equipped to install water-resistant laminate flooring with confidence.
Now, not only can you protect your space from moisture, but you can also enjoy a visually appealing and long-lasting floor. Laminate flooring offers the perfect balance of beauty and durability, making it a smart choice for any home or commercial space.
Remember, proper preparation of the subfloor, careful acclimation of the planks, and selecting the right installation method are essential for a successful installation. Additionally, ensure proper waterproofing techniques and follow regular floor care tips to maintain the floor's integrity and water resistance over time.
We hope that this tutorial has empowered you to level up your DIY skills and create a beautiful, water-resistant laminate floor. Whether you're renovating your home or updating a commercial space, this guide will help you achieve professional-looking results. Get ready to enjoy the benefits of a stunning, moisture-resistant floor for years to come!
FAQ
Can I install waterproof laminate flooring in all areas of my home?
While waterproof laminate flooring is highly resistant to moisture, it is still important to consider the specific needs of each area in your home. It is not recommended to install it in areas with excessive moisture, such as bathrooms or laundry rooms. However, it can be used in kitchens, living rooms, bedrooms, and other areas where occasional spills or moisture may occur.
How do I prepare my subfloor for waterproof laminate flooring installation?
Before installing waterproof laminate flooring, it is crucial to ensure that your subfloor is clean, dry, and level. Start by removing any existing flooring materials and addressing any moisture issues. Next, thoroughly clean the subfloor and level any uneven areas. Finally, install a moisture barrier, such as an underlayment, to further protect against moisture infiltration.
Can I install waterproof laminate flooring over existing flooring?
In some cases, you may be able to install waterproof laminate flooring over existing flooring. However, it is essential to evaluate the condition and type of your existing flooring. Ensure that it is clean, level, and in good condition. Additionally, consult the manufacturer's guidelines for installation over existing flooring to ensure compatibility and proper installation techniques.
How long does it take to acclimate laminate planks before installation?
The time required for acclimating laminate planks may vary depending on the manufacturer's recommendations and environmental conditions. Typically, it is recommended to acclimate the planks in the room where they will be installed for approximately 48 to 72 hours. This allows the planks to adjust to the temperature and humidity of the space, reducing the risk of expansion or contraction after installation.
What is the best installation method for waterproof laminate flooring?
The best installation method for waterproof laminate flooring depends on various factors, including the specific product, manufacturer recommendations, and the condition of your subfloor. Common installation methods include floating, glue-down, and click-lock systems. It is essential to carefully read and follow the manufacturer's instructions and consult professionals if needed to determine the most suitable installation method for your specific project.
How do I maintain waterproof laminate flooring?
To maintain waterproof laminate flooring, regularly sweep or vacuum the surface to remove dirt and dust. Wipe up spills or moisture promptly to prevent damage. Avoid using excessive water or wet mops during cleaning, as this can penetrate the seams and cause swelling or warping. Use a damp mop or a recommended laminate floor cleaner for routine cleaning, following the manufacturer's instructions.
What should I do if I encounter installation issues during the process?
If you encounter installation issues, it is essential to pause and assess the situation. Double-check your measurements, ensure proper acclimation and subfloor preparation, and review the manufacturer's instructions. If necessary, consult professionals or reach out to the manufacturer for guidance. Troubleshooting common issues, such as gaps or uneven surfaces, may involve adjusting the installation technique or using specialized tools.
Can I install waterproof laminate flooring over radiant heating systems?
Yes, in most cases, you can install waterproof laminate flooring over radiant heating systems. However, it is crucial to follow the manufacturer's guidelines for compatibility and proper installation techniques. Radiant heating systems should be properly installed and operational before installing the laminate flooring. It is also recommended to consult professionals for guidance on installing flooring over radiant heating systems to ensure optimal performance and longevity.