


Seamless Transitions: Expert Tips for Laminate Flooring Across Multiple Rooms
Seamless Transitions: Expert Tips for Laminate Flooring Across Multiple Rooms
When it comes to designing your home, maintaining a seamless transition between rooms is essential for creating a cohesive and aesthetically pleasing look. One of the key elements in achieving this is through the use of laminate flooring. Its versatility, durability, and wide range of styles make it an ideal choice for transitioning between different spaces.
In this article, we will provide you with expert tips and techniques for seamlessly transitioning laminate flooring between rooms. Whether you're renovating your entire home or just a few rooms, we'll guide you through the process of planning, installation, and design choices that will help you achieve a flawless transition. So let's dive in and discover how you can elevate the style and continuity of your living spaces with laminate flooring.
Key Takeaways:
- Transitioning laminate flooring between rooms creates a cohesive look that enhances the overall aesthetic of your home.
- Proper planning, including selecting the right flooring and analyzing room layouts, is crucial for a smooth transition.
- Acclimating laminate flooring before installation ensures stability and longevity.
- Preparing the existing flooring surfaces is essential for a successful installation.
- Choosing the right transition molding is important for achieving a seamless transition between rooms.
Planning for a Smooth Transition
Before diving into the installation process of laminate flooring, it's crucial to plan and consider key factors that will contribute to a seamless transition between rooms. Proper planning will help you achieve a cohesive and visually appealing look throughout your home. In this section, we will discuss important aspects such as choosing the right laminate flooring, analyzing room layouts, and exploring creative transition ideas.
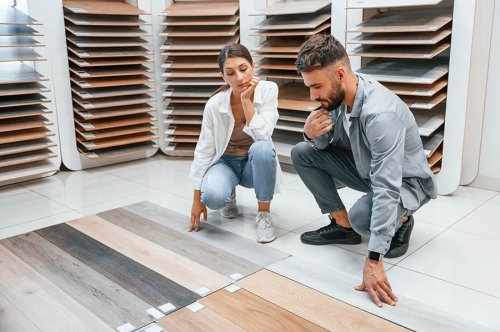
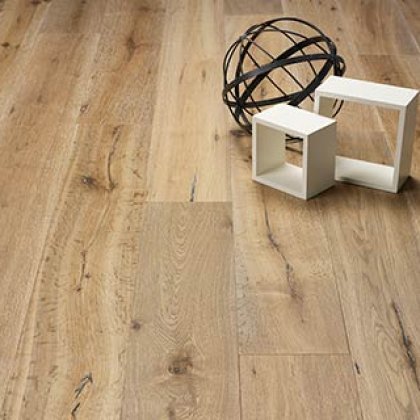
Choosing the Right Laminate Flooring
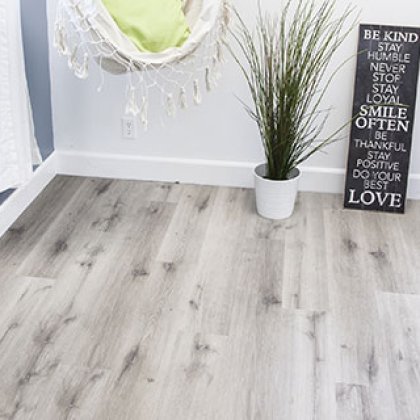
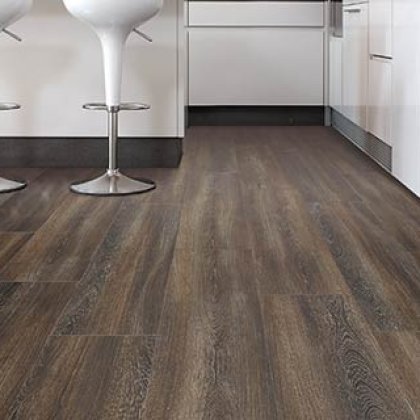
When selecting laminate flooring for your home, it's essential to consider both style and functionality. Look for options that complement your overall interior design and meet your specific requirements in terms of durability, maintenance, and budget. With a wide variety of colors, patterns, and finishes available, you can find laminate flooring that matches your aesthetic preferences and enhances the ambiance of your space.
Analyzing Room Layouts
Understanding the layout of your rooms is crucial for achieving a seamless transition with laminate flooring. Take note of doorways, architectural features, and traffic flow to determine the best installation method and transition options. By carefully analyzing the dimensions and characteristics of each room, you can ensure that your flooring installation seamlessly integrates with the existing elements.
Exploring Creative Transition Ideas
When transitioning between different rooms, there are various creative ideas you can explore to enhance the visual appeal of your flooring. Consider using transition strips, borders, or thresholds to delineate the transition between spaces. You can also experiment with different patterns, such as herringbone or chevron, to add visual interest and create a unique design statement. By incorporating creative transition ideas, you can elevate the overall aesthetic of your laminate flooring installation.
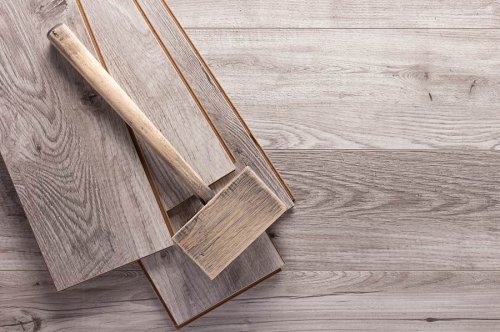
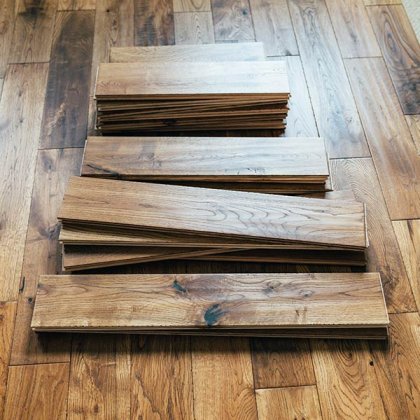
Acclimating Your Laminate Flooring
Properly acclimating your laminate flooring is a crucial step to ensure its stability and longevity. By allowing the laminate planks to adjust to the temperature and humidity of the installation area, you can prevent potential issues such as warping or buckling. This DIY process not only saves you time but also ensures a successful and hassle-free installation.
Why is acclimation important?
Acclimation refers to the process of letting your laminate flooring adjust to the environment in which it will be installed. Laminate planks are made of multiple layers, including a moisture-resistant core, decorative layer, and protective topcoat. These layers can expand or contract with changes in temperature and humidity. Proper acclimation allows the planks to reach a moisture equilibrium with the installation area, reducing the risk of structural damage and ensuring a long-lasting, beautiful result.
How to acclimate your laminate flooring
The acclimation process is simple and straightforward. Here's a step-by-step guide to help you acclimate your laminate flooring:
- Start by purchasing your laminate flooring and storing it in the room where it will be installed. This allows the planks to acclimate to the temperature and humidity of the space.
- Keep the laminate flooring in its original packaging and let it sit undisturbed for at least 48 hours. This timeframe may vary depending on the manufacturer's recommendations, so be sure to check the packaging or installation instructions.
- Ensure that the room temperature and humidity levels are within the recommended range. Most manufacturers suggest maintaining a temperature of 65-85°F (18-29°C) and a humidity level of 35-65%.
- During the acclimation period, avoid exposing the laminate flooring to extreme temperature changes, direct sunlight, or excessive moisture. This can disrupt the acclimation process and affect the stability of the planks.
Monitoring the acclimation process
While the laminate flooring is acclimating, it's essential to monitor the temperature and humidity levels regularly. You can use a humidity meter, also known as a hygrometer, to ensure the conditions are within the recommended range. This simple tool will help you confirm when the laminate flooring is ready for installation.
Expert Tip: Before starting the acclimation process, it's a good idea to measure the moisture content of the subfloor. This will help you identify any existing moisture issues that may affect the acclimation process and the overall performance of your laminate flooring.
Summary
Acclimating your laminate flooring is a crucial step in ensuring a successful and durable installation. By allowing the planks to adjust to the temperature and humidity of the installation area, you can prevent issues like warping or buckling. Remember to follow the manufacturer's guidelines for acclimation time and maintain the recommended temperature and humidity levels. With proper acclimation, your DIY laminate flooring project will result in a beautiful, long-lasting floor that you can enjoy for years to come.
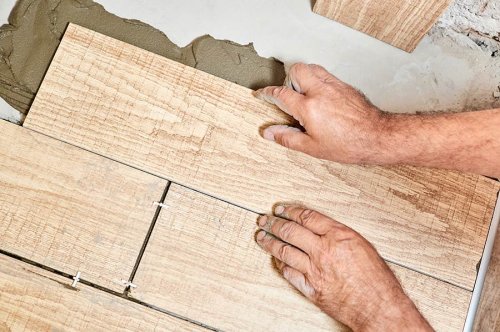
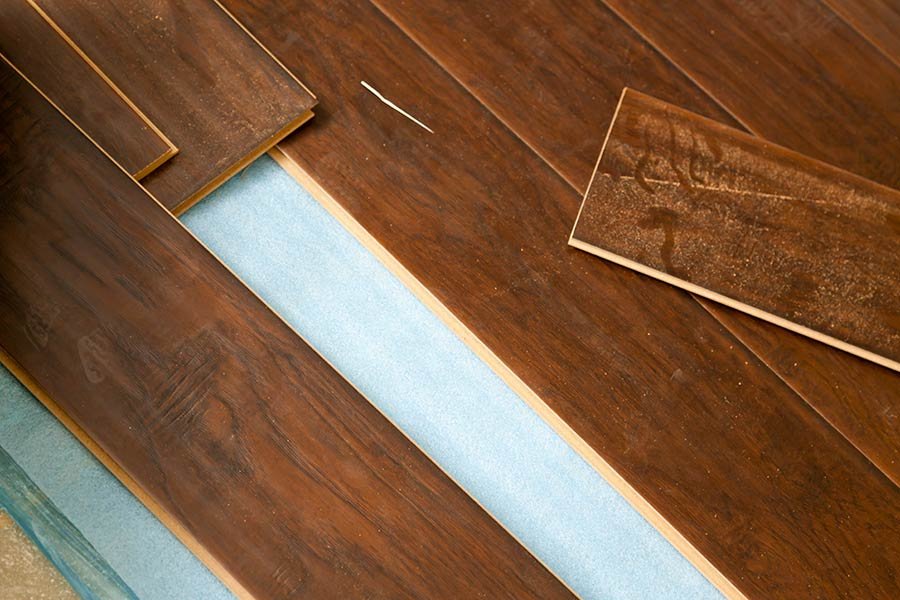
Preparing the Existing Flooring
Before you can begin the laminate flooring installation process, it's crucial to properly prepare the existing flooring surfaces. This step is essential to ensure a smooth and durable finish for your new laminate flooring. Here are the key steps to follow:
- Remove old carpeting: Start by removing any existing carpeting or flooring materials. Use a utility knife or carpet cutter to carefully cut and remove the carpet, taking care not to damage the underlying subfloor.
- Clean the subfloor: Once the carpeting is removed, thoroughly clean the subfloor to remove any dirt, debris, or adhesive residue. This will ensure a clean and level surface for the installation of your laminate flooring.
- Level the subfloor: Use a leveling compound to fill in any low spots or uneven areas on the subfloor. Follow the manufacturer's instructions for preparing and applying the leveling compound, ensuring a flat surface for the laminate flooring installation.
Addressing these steps will help create a solid foundation for your new laminate flooring and minimize the risk of any issues such as bumps or uneven surfaces.
Expert Tip: It's important to address any potential challenges during the preparation process to avoid future problems with your laminate flooring installation. If you're unsure about any aspect of the preparation, consult a professional for guidance.
Now that you have a clean and level subfloor, you're ready to move on to the next step in the installation process. In the following section, we'll guide you through choosing the right transition molding to achieve a seamless and polished look for your laminate flooring installation.
| Pros of Preparing the Existing Flooring | Cons of Neglecting Preparation |
|---|---|
|
|
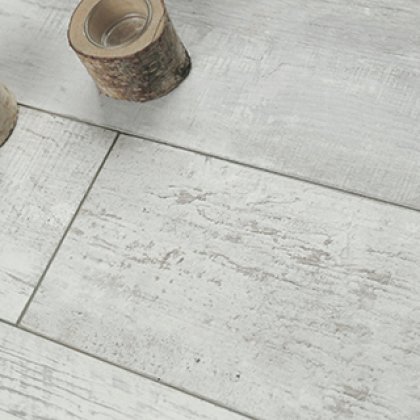
Choosing the Right Transition Molding
When it comes to achieving a seamless transition between rooms with laminate flooring, the right transition molding is key. Not only does it provide a smooth and visually pleasing connection, but it also helps to protect the edges of your flooring and prevent tripping hazards. In this section, we'll explore various types of transition moldings and provide tips on selecting the perfect one for your specific needs.
Types of Transition Moldings
Transition moldings come in a range of styles and materials to suit different flooring types and design preferences. Here are some popular options:
- T-Molding: This type of molding is commonly used when transitioning between two rooms with the same level of flooring. It creates a T-shaped profile that bridges the gap between the rooms.
- Reducer: Reducers are ideal when transitioning from laminate flooring to a lower surface, such as vinyl or carpet. They provide a gradual slope that makes the transition smooth and safe.
- Threshold: Threshold moldings are used to transition between rooms with different floor heights or types. They provide a visually appealing transition while covering the gap.
- Stair Nose: If you have laminate flooring on a staircase, a stair nose molding is essential. It creates a finished edge and enhances the safety of your stairs.
Choosing the Right Transition Molding
Choosing the right transition molding depends on factors such as the height difference between floors, the type of flooring materials, and the overall design aesthetic you want to achieve. Here are a few tips to help you make the right choice:
- Consider the height difference: If you have a significant height difference between floors, opt for a transition molding that can accommodate the gap while maintaining a seamless transition.
- Match the color and finish: Select a molding that matches or complements the color and finish of your laminate flooring. This will create a cohesive look and enhance the overall aesthetics of your space.
- Choose durable materials: Transition moldings are subjected to foot traffic and wear, so it's important to choose materials that can withstand regular use and maintain their appearance over time.
- Consult with a professional: If you're unsure about which transition molding to choose or need guidance on installation, don't hesitate to consult with a flooring professional. They can provide expert advice based on your specific needs and requirements.
By carefully selecting the right transition molding, you can achieve a seamless and visually appealing transition between rooms with laminate flooring. Next, let's explore the installation techniques to ensure a secure and durable finish.
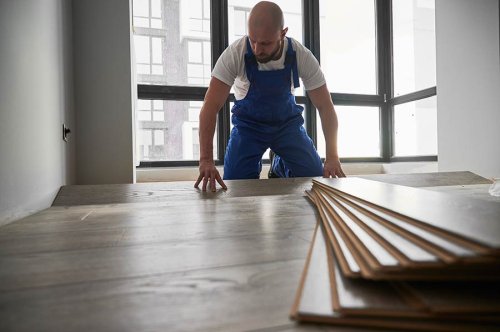
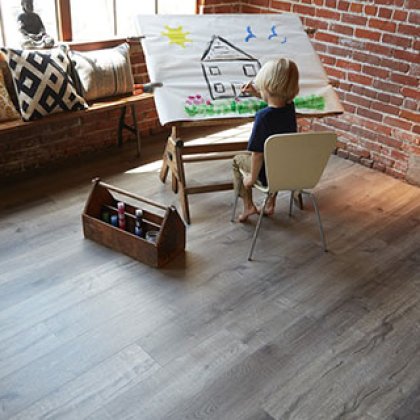
Installing Laminate Flooring in Adjoining Rooms
When it comes to creating a seamless transition between rooms, proper installation of laminate flooring is crucial. In this section, we will guide you through the step-by-step process of installing laminate flooring in adjoining rooms. By following these essential techniques, you can ensure a smooth and cohesive look throughout your home.
Undercutting Door Jambs
One of the key challenges when installing laminate flooring in adjoining rooms is dealing with door jambs. To achieve a clean and professional finish, it's important to undercut the door jambs to allow the flooring to slide underneath, creating a seamless appearance. This can be done using a handsaw or a jamb saw, depending on your preferences and tools available.
Transitioning Between Different Floor Heights
Another consideration when installing laminate flooring in adjoining rooms is dealing with different floor heights. Whether transitioning from a tiled area to laminate or from one type of laminate to another, it's important to create a seamless transition between these different levels. This can be achieved by using transition moldings, such as T-moldings or reducers, to bridge the height difference and create a smooth flow between the rooms.
Creating Smooth Transitions in Open-Concept Spaces
For homes with open-concept spaces, creating smooth transitions between different areas can enhance the overall aesthetic. One way to achieve this is by using a feature strip or a border between two rooms, which creates a defined separation while still maintaining a cohesive look. This can be particularly effective when transitioning between a living room and dining area or a kitchen and a hallway.
Expert Tip: When installing laminate flooring in adjoining rooms, take the time to carefully plan the layout and design. Consider the flow of natural light, the existing color palette, and the overall style of your home. This will help you create a seamless transition that enhances the visual appeal and adds value to your space.
By following these techniques and paying attention to the details, you can achieve a seamless installation of laminate flooring in adjoining rooms. This will not only enhance the overall aesthetic of your home but also create a space that feels unified and harmonious.
Enhancing Continuity with Design Choices
Beyond the technical aspects of installation, the design choices you make can greatly enhance the continuity between rooms in your home. When transitioning between different spaces, consider the overall aesthetics and how each room flows into the next. By incorporating thoughtful design elements, you can create a harmonious and visually appealing environment.
Color Coordination
One of the simplest ways to create a cohesive look is through color coordination. Choose a color palette that complements each room and use it consistently throughout your home. This could involve selecting flooring options in similar shades or utilizing complementary accent colors in furniture, curtains, and accessories. By maintaining consistency in color, you'll achieve a seamless transition that ties the rooms together.
Patterns and Textures
Introducing patterns and textures that are consistent across multiple rooms can also enhance continuity. Consider incorporating elements like patterned rugs, textured wallpapers, or decorative tiles that span different areas of your home. These design choices add visual interest and create a sense of flow, connecting the rooms in a visually pleasing way.
Baseboard and Molding
Coordinating baseboards and molding can contribute to a polished and unified look. Choose a style and color that complements your laminate flooring and install it consistently throughout your home. This attention to detail ensures a seamless transition between rooms and adds a touch of elegance to your overall design.
Furniture and Layout
Thoughtful furniture arrangement can also contribute to the visual continuity between rooms. Consider the flow of movement, ensuring that there is sufficient space for easy transitions between areas. Additionally, choose furniture pieces that complement the overall design aesthetic, creating a cohesive look that ties each room together.
| Design Choice | Description |
|---|---|
| Color Coordination | Select a consistent color palette throughout your home for a seamless transition between rooms. |
| Patterns and Textures | Incorporate consistent patterns and textures across multiple rooms to create visual flow. |
| Baseboard and Molding | Choose baseboards and molding that coordinate with your laminate flooring to enhance continuity. |
| Furniture and Layout | Arrange furniture strategically to facilitate smooth transitions and select pieces that complement the overall design. |
By incorporating these design ideas and carefully considering color coordination, patterns, baseboards, molding, furniture, and layout, you can create a seamless and visually appealing transition between rooms in your home, enhancing the overall continuity and flow.
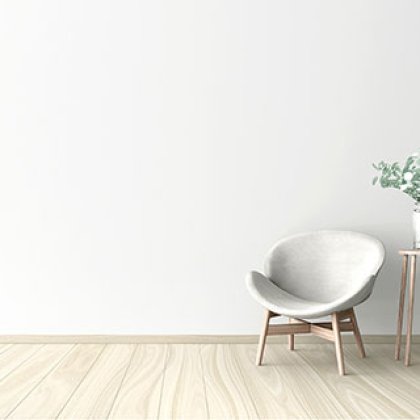
Radiating Natural Light and Openness
Natural light and openness are key elements in creating a seamless transition between rooms. By strategically incorporating these elements into your design, you can enhance the overall visual appeal and promote a harmonious flow throughout your home. In this section, we'll explore strategies for maximizing natural light, utilizing mirrors effectively, and embracing open floor plans to create an inviting and airy atmosphere.
Maximizing Natural Light
One of the most effective ways to enhance the transition between rooms is by maximizing the amount of natural light that enters your space. Here are a few strategies to consider:
- Remove heavy curtains or blinds that block natural light and replace them with sheer or light-filtering window treatments.
- Position furniture away from windows to allow light to penetrate deeper into the room.
- Consider installing skylights or light tubes to bring in additional natural light from above.
Using Mirrors Strategically
Mirrors are a powerful tool for creating the illusion of space and enhancing the flow between rooms. Here's how you can use them strategically:
- Place mirrors opposite windows to reflect natural light and make the room appear brighter and more open.
- Strategically position mirrors to create sightlines that visually connect different areas, contributing to a seamless transition.
- Use oversized mirrors to create a focal point and add depth to smaller rooms.
Incorporating Open Floor Plans
Open floor plans can help create a seamless transition between rooms by removing physical barriers and allowing for a continuous flow of light and movement. Consider the following:
- Remove non-load-bearing walls to open up the space and create a sense of unity.
- Use furniture placement and area rugs to define functional zones while maintaining an open feel.
- Choose flooring materials, such as laminate, that can seamlessly extend from one room to another, visually connecting the spaces.
Incorporating these strategies into your design can significantly enhance the natural flow and continuity between rooms. By maximizing natural light, strategically using mirrors, and embracing open floor plans, you'll create an inviting and cohesive atmosphere.
Maintaining Consistency in Flooring Care
Once your laminate flooring is installed, it's important to prioritize proper maintenance to ensure its longevity and preserve its beauty. By following these essential laminate flooring tips, you can keep your floors looking pristine for years to come.
Regular Cleaning
To maintain the luster and cleanliness of your laminate flooring, it's essential to establish a regular cleaning routine. Here are some tips to keep in mind:
- Use a soft-bristle broom or a microfiber mop to sweep away dust and debris on a daily or weekly basis.
- Avoid using excessive water during the cleaning process, as it can seep into the joints and cause damage over time.
- For more thorough cleaning, lightly dampen a microfiber mop or cloth with water and a mild laminate floor cleaner. Ensure that the mop or cloth is only slightly damp to prevent water damage.
- Wipe up spills immediately to prevent staining or warping of the laminate flooring.
Proper Use of Cleaning Products
When using cleaning products on your laminate flooring, it's crucial to choose the right ones to avoid damage. Here are some guidelines:
- Avoid wax-based or oil-based cleaners, as they can leave residue and make the floor slippery.
- Use laminate floor cleaners specifically designed for laminate flooring. These cleaners are formulated to clean effectively without causing damage or leaving a sticky residue.
- Before using any new cleaning product, test it in a small, inconspicuous area to ensure compatibility with your laminate flooring.
Preventing Damage
To protect your investment and prevent damage to your laminate flooring, consider these preventative measures:
- Place mats or rugs at entryways to trap dirt and moisture before they reach the laminate flooring.
- Use felt pads or furniture coasters under the legs of furniture to prevent scratches or indentations.
- Avoid dragging heavy objects across the laminate flooring, as it can lead to scratches or damage to the surface.
- Be cautious when wearing high heels or shoes with cleats, as they can cause indentations or scratches on the laminate flooring.
By incorporating these laminate flooring tips into your regular cleaning routine and taking preventative measures, you can maintain the beauty and durability of your laminate flooring for years to come.
| Problem | Solution |
|---|---|
| Stains | Gently blot the stain with a clean, damp cloth using a mild laminate floor cleaner. Avoid scrubbing, as it can damage the flooring. If the stain persists, consult the manufacturer's guidelines for further instructions. |
| Scratches | Use a laminate floor repair kit to fill in minor scratches. For deeper scratches, consult a professional for repair options. |
| Water Damage | Absorb excess water immediately to prevent damage. If water seeps into the joints and causes swelling or warping, contact a professional to assess the extent of the damage. |
| UV Damage | Consider using window treatments or UV-protective film on your windows to minimize exposure to direct sunlight, which can fade the color of your laminate flooring over time. |
Considering Future Changes and Updates
As your home evolves, you may want to make changes or updates to your flooring. Whether you're looking to remove old laminate flooring or considering a complete replacement, proper planning and approach are essential for a successful project. Here are some key considerations to keep in mind:
Assessing the Current Condition
Before proceeding with any changes or updates, take the time to assess the current condition of your laminate flooring. Check for any signs of wear, damage, or moisture issues that may affect the overall integrity of the floor. This evaluation will help you determine the best course of action.
Removing Laminate Flooring
If you decide to remove existing laminate flooring, there are a few methods you can consider depending on the installation type. The two common installation methods for laminate flooring are click-lock and glue-down. Here's a breakdown of the removal process for each:
- Click-Lock Installation: Start by removing the baseboard or quarter-round molding along the perimeter of the room. Then, gently lift and separate the individual laminate planks by detaching the click-lock mechanism. Work your way from one end of the room to the other, carefully removing each plank until the entire floor is cleared.
- Glue-Down Installation: Begin by using a heat gun or hairdryer to soften the adhesive. Once the adhesive is heated, carefully pry up the laminate planks using a putty knife or similar tool. Take your time to avoid damaging the subfloor or adjacent materials. Repeat this process until the entire laminate floor has been removed.
Choosing the Right Replacement
When selecting new laminate flooring, consider the style, color, and durability that best suits your needs and preferences. Take into account the overall design and aesthetic of your home to ensure a harmonious transition between rooms. Here are a few popular laminate flooring options to consider:
| Laminate Flooring Type | Description |
|---|---|
| Laminate Planks | Resemble the appearance of hardwood flooring; available in various wood species and finishes. |
| Laminate Tiles | Simulate the look of natural stone or ceramic tiles; provide a versatile and cost-effective alternative. |
| Laminate Waterproof Flooring | Offer enhanced protection against moisture, making them suitable for kitchens, bathrooms, and basements. |
Professional Installation or DIY?
Deciding whether to hire a professional installer or tackle the project yourself depends on your level of comfort and experience with flooring installations. While DIY installations can be cost-effective, professional installers bring expertise and efficiency to the process. Consider your time, budget, and skill level before making a decision.
Maintaining Consistency
To maintain consistency in your flooring, it's essential to properly care for your new laminate flooring. Regular cleaning and maintenance routines will help extend its lifespan and preserve its appearance. Refer to our maintenance tips in Section 9 for guidance on how to care for your laminate flooring.
With careful planning and consideration, future changes and updates to your laminate flooring can be a seamless process. Whether you choose to remove or replace your existing flooring, prioritize quality products, proper techniques, and attention to detail for a successful outcome.
Conclusion
With our expert tips and techniques, achieving a seamless transition between rooms using laminate flooring is within reach. By taking the time to plan and prepare, as well as following proper installation practices, you can effortlessly elevate the continuity and style of your home. The endless design possibilities that laminate flooring offers allow you to create a cohesive look that enhances the overall aesthetic of your living spaces.
Throughout this article, we have explored practical advice and design ideas to help you achieve a flawless transition. From choosing the right laminate flooring and acclimating it properly to preparing the existing flooring and selecting the appropriate transition molding, each step is crucial in creating a seamless flow between rooms.
Furthermore, we discussed the step-by-step installation process, including techniques for dealing with door jambs, different floor heights, and open-concept spaces. Building on this foundation, we explored design choices that can enhance continuity, such as color coordination, patterns, and furniture selection. We also touched on the importance of natural light and open floor plans in creating a visually appealing and inviting atmosphere.
Lastly, we emphasized the significance of consistent flooring care and provided maintenance tips to protect your investment. Additionally, we delved into considerations for future changes and updates to your laminate flooring, offering guidance on approaching these projects with ease and efficiency.
FAQ
How can I achieve a seamless transition between rooms when using laminate flooring?
To achieve a seamless transition, you can use the same laminate flooring throughout the rooms. Ensure that the planks are installed in the same direction and consider using transition molding to create a smooth flow. Another option is to use different colored or textured laminate flooring to create a deliberate transition zone.
What are some tips for planning a smooth transition with laminate flooring?
When planning for a smooth transition, consider the layout and function of each room. Analyze the traffic flow and the type of flooring in adjacent rooms. You can create a transition zone by using different patterns or materials around the borders of each room. Additionally, selecting laminate that matches or complements the existing flooring can help achieve a cohesive look.
How do I acclimate my laminate flooring before installation?
It is important to allow your laminate flooring to adjust to the environment before installation to prevent issues such as warping. Place the unopened boxes of laminate flooring in the room where it will be installed for at least 48 hours. This will allow the planks to acclimate to the temperature and humidity of the space.
How do I prepare the existing flooring before installing laminate?
Before installing laminate flooring, it is essential to prepare the existing flooring. Remove any carpet, and ensure the subfloor is clean and level. Repair any damaged areas and address any issues with the subfloor, such as protruding nails or unevenness. This will provide a smooth and stable base for your laminate flooring installation.
What type of transition molding should I use for laminate flooring?
The type of transition molding you choose will depend on the specific needs of your room. T-molding is typically used to transition between two rooms of equal height, while reducer molding is used for height differences. You can also opt for threshold molding for transitioning between laminate and another type of flooring, such as carpet or tile.
How do I install laminate flooring in adjoining rooms?
To install laminate flooring in adjoining rooms, start by installing the planks in one room and run them under the doorway into the adjacent room. Cut the planks to fit around door frames or obstructions, ensuring a tight fit. Use transition molding to create a seamless transition between the two rooms.