


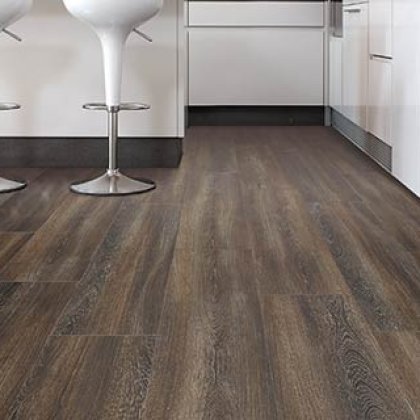
Kitchen Makeover: Step-by-Step Laminate Flooring Installation Guide
Kitchen Makeover: Step-by-Step Laminate Flooring Installation Guide
Welcome to our comprehensive guide on transforming your kitchen with a stunning laminate flooring installation. In this step-by-step guide, we will walk you through the entire process of installing laminate flooring in your kitchen, allowing you to achieve a beautiful and durable result. With the rise of DIY kitchen renovations, laminate flooring has become a popular choice due to its affordability, ease of installation, and versatility. By following our guide, you can confidently tackle this project and give your kitchen a fresh new look.
Key Takeaways:
- Transform your kitchen with the step-by-step guide to installing laminate flooring.
- Laminate flooring is a cost-effective and easy-to-install option for kitchen renovations.
- By following our guide, you can achieve a beautiful and durable result.
- Discover the benefits of laminate flooring and its suitability for kitchen spaces.
- Embark on your own DIY kitchen renovation journey with confidence.
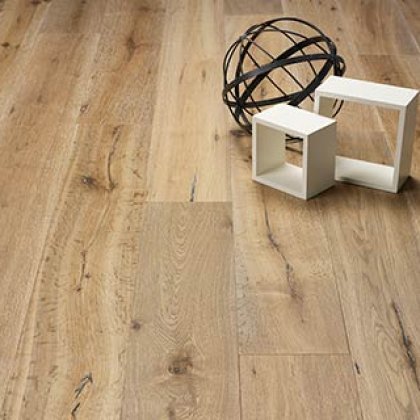
Choosing the Right Laminate Flooring
When it comes to selecting laminate flooring for your kitchen, there are a few key factors to consider. Whether you're renovating your kitchen or simply updating the flooring, choosing the right laminate is crucial for achieving both style and functionality. Take note of these handy tips to make an informed decision that will enhance your kitchen's aesthetic appeal and durability.
Durability and Water Resistance
One of the most important aspects to consider when choosing laminate flooring for the kitchen is its durability and water resistance. The kitchen is a high-traffic area with frequent spills and moisture, so opt for laminate that is specifically designed to withstand these conditions. Look for laminate with a water-resistant core and a protective wear layer that will guard against scratches and stains.
Style and Design Options
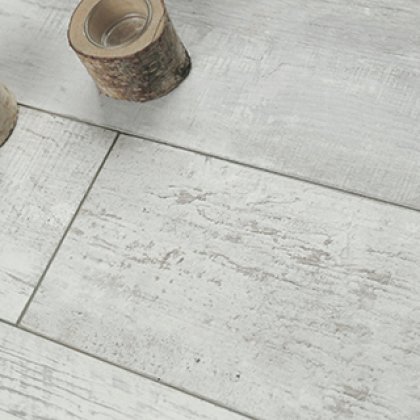
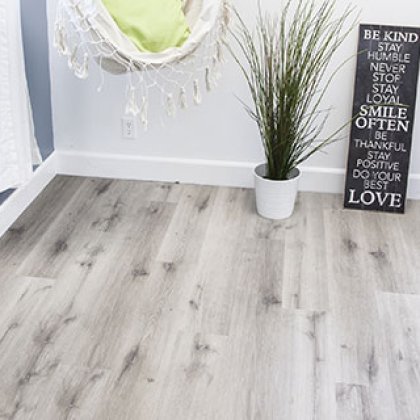
Another crucial aspect to consider is the style and design options available for laminate flooring. Whether you prefer a traditional or contemporary look, laminate offers a wide range of patterns, colors, and textures to suit your kitchen's aesthetic. From realistic wood or stone finishes to sleek modern designs, laminate flooring allows you to achieve the desired look without breaking the bank.
| Benefits of Laminate Flooring for Kitchens | Drawbacks of Laminate Flooring for Kitchens |
|---|---|
| 1. Affordable and cost-effective | 1. Susceptible to moisture damage if not properly installed or maintained |
| 2. Wide variety of styles, colors, and finishes | 2. Can be noisy underfoot |
| 3. Easy to clean and maintain | 3. Not as durable as natural hardwood or stone |
| 4. Resistant to fading and discoloration | 4. Limited options for refinishing or repairing damaged areas |
Budget Considerations
Budget is always an important consideration when selecting any type of flooring. Laminate flooring offers a cost-effective solution compared to natural hardwood or stone flooring options. Determine your budget and explore laminate options within your price range. Remember to also factor in the cost of underlayment and installation when planning.
Installation Tips
Lastly, consider the installation process when choosing laminate flooring. Some laminate options feature a click-and-lock installation system, which makes it easier for DIY enthusiasts to install themselves. However, it's important to note that kitchen installations may require additional precautions and professional assistance, especially when dealing with appliances and complex layouts.
By considering these important factors - durability, style, budget, and installation - you can confidently choose the right laminate flooring for your kitchen. Enjoy the benefits of a beautiful, low-maintenance floor that will withstand the demands of your busy kitchen.
Preparing the Kitchen for Installation
Before you begin the exciting process of installing laminate flooring in your kitchen, it's important to properly prepare the space. This section will guide you through the necessary steps to ensure a smooth and successful installation.
Removing Old Flooring
If you currently have another type of flooring in your kitchen, such as tile or vinyl, it's crucial to remove it before installing laminate. Start by removing any baseboards or moldings around the edges of the room. Then, carefully pry up the old flooring using a pry bar or scraper tool. Make sure to dispose of the old flooring materials properly.
Cleaning the Subfloor
Once the old flooring has been removed, it's time to clean the subfloor. Use a vacuum or broom to remove any loose debris, such as dirt or dust. Next, thoroughly clean the subfloor with a mild detergent and water solution, ensuring there are no stains or sticky residues. Allow the subfloor to dry completely before proceeding to the next steps.
Ensuring a Smooth Surface for the Laminate
In order for the laminate flooring to lay flat and securely, it's essential to have a smooth and level surface. Inspect the subfloor for any uneven spots, cracks, or bumps. If you come across any imperfections, use a floor leveling compound or patching compound to fill in the gaps and create a smooth surface. Allow the compound to dry and sand it down until it's level with the rest of the subfloor.
Once you've completed these preparations, your kitchen will be ready for the laminate flooring installation process. The next section will guide you through gathering the necessary tools and materials for the project.
Gathering the Tools and Materials
Before embarking on your laminate flooring installation in the kitchen, it's crucial to gather all the necessary tools and materials. Having everything on hand will ensure a smooth and efficient process, saving you time and frustration. Here's a comprehensive list of what you'll need:
Tools
- Tape Measure
- Saw - either a circular saw or a jigsaw
- Hammer
- Utility Knife
- Chalk Line
- Screwdriver
- Notched Trowel
- Spacers
- Roller
- Pry Bar
- Gloves
- Eye Protection
Materials
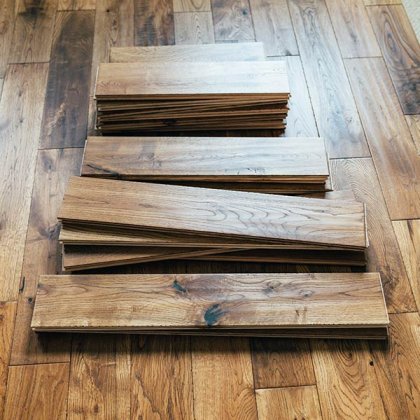
- Laminate Flooring Planks
- Underlayment
- Adhesive
- Transition Strips
- Baseboards
- Screws
- Finishing Nails
- Adhesive Tape
Having the right tools and materials will make your laminate flooring installation project go smoothly. Make sure to gather everything before you start, and double-check that you have all the necessary items.
Measuring and Planning the Layout
Accurate measurement and careful planning are essential for a successful laminate flooring installation in your kitchen. Taking the time to measure your space correctly and plan the layout will ensure a seamless and visually appealing end result. Here are some tips to help you get started:
- Measure the dimensions of your kitchen: Begin by measuring the length and width of your kitchen using a tape measure. Be sure to account for any alcoves, islands, or other irregularities in the space.
- Consider your design preferences: Think about the direction in which you want the laminate planks to run. Most commonly, they are installed parallel to the longest wall for a more spacious feel. However, you can also opt for a diagonal or herringbone pattern to add visual interest.
- Account for doorways and transitions: Measure the width of any doorways or openings in the kitchen. This will help you determine where to make necessary cuts in the laminate planks and plan for transitions between rooms if needed.
Once you have gathered all the measurements and considered your design preferences, it's time to plan the layout of your laminate flooring. This can be done on paper or using digital planning tools. Here are a few additional tips:
- Create a sketch or use a digital tool to visualize the layout: Plot the dimensions of your kitchen on paper or use a digital tool to create a virtual floor plan. This will help you visualize how the laminate flooring will look in the space.
- Optimize material usage: Plan the layout in a way that minimizes waste and optimizes the utilization of the laminate planks. This will help you save money and ensure a more efficient installation process.
- Consider expansion gaps: Leave a small gap, typically around ¼ inch, between the laminate flooring and the walls or any fixed objects. This allows the flooring to expand and contract with changes in temperature and humidity.
Remember, accurate measurement and careful planning are crucial for a successful laminate flooring installation in your kitchen. Taking the time to measure your space correctly and plan the layout will ensure a seamless and visually appealing end result.
By following these tips and investing time in measuring and planning your layout, you'll be well-prepared to move on to the next step of your laminate flooring installation journey.
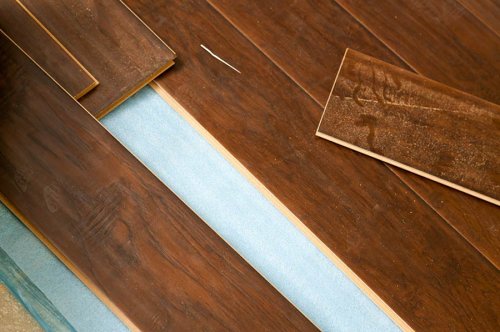
Installing the Underlayment
Installing the underlayment is a crucial step in the laminate flooring installation process. Not only does it provide a cushioned surface for the laminate, but it also helps prevent moisture from seeping into the flooring, ultimately extending its lifespan. Here's a step-by-step guide on how to install underlayment for your kitchen flooring installation:
- Prepare the subfloor: Ensure that the subfloor is clean, dry, and level. Remove any debris, dust, or existing flooring to create a smooth surface for the underlayment.
- Measure and cut the underlayment: Take accurate measurements of your kitchen floor and cut the underlayment accordingly. It's important to leave a small gap (about 1/4 inch) around the edges of the room to allow for expansion.
- Lay the underlayment: Begin by unrolling the underlayment across the kitchen floor, starting from one corner. Make sure the underlayment covers the entire surface, overlapping the seams by a few inches. Secure the underlayment in place with tape or staples, ensuring it lays flat and doesn't bunch up or wrinkle.
- Trim excess underlayment: Once the underlayment is in place, trim any excess material around the edges of the room using a utility knife. This will create a neat and precise finish.
By following these steps, you'll ensure a solid foundation for your laminate flooring, providing a comfortable, durable, and moisture-resistant surface for your kitchen. Take a look at the table below for a quick summary of the benefits of underlayment installation:
| Benefits of Installing Underlayment | |
|---|---|
| Provides cushioning: The underlayment adds a layer of cushioning under the laminate flooring, creating a comfortable surface to walk on and reducing noise. |
Prevents moisture: By acting as a moisture barrier, the underlayment helps protect the laminate flooring from the potential damage caused by moisture and water spills. |
| Increases durability: Installing underlayment enhances the overall durability of the laminate flooring, making it more resistant to wear and tear over time. |
Smooths out imperfections: The underlayment helps create a smoother surface by filling in minor subfloor imperfections, resulting in a more even and professional-looking installation. |
Now that you've installed the underlayment, you're ready to move on to the next step: clicking and locking the laminate flooring into place. Stay tuned for the next section of our step-by-step guide to complete your kitchen flooring installation.
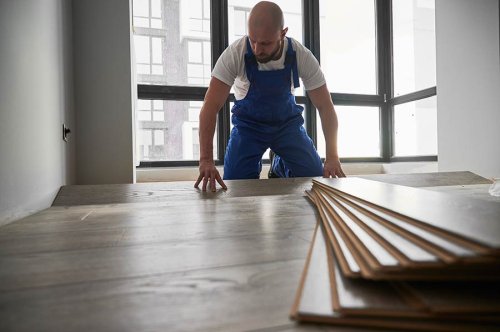
Clicking and Locking the Laminate Flooring
In this section, we will guide you through the actual installation process of the laminate flooring planks in your kitchen. The click-and-lock mechanism makes it a breeze to lay each plank seamlessly, ensuring a professional-looking finish.
-
Step 1: Prepare the First Row
Start by placing the first plank against the wall, ensuring a small gap for expansion. Use spacers to maintain a consistent gap along the entire wall. Remember to leave enough space for any door frames or other obstacles that may require trimming.
-
Step 2: Click the Second Plank
Take the second plank and fit the tongue into the groove of the first plank at a slight angle. Gradually lower the plank until it clicks into place. Repeat this process, connecting each plank to the previous one, until you complete the first row.
-
Step 3: Continue with Additional Rows
For the second row, start with a shorter plank to stagger the joints, creating an aesthetically pleasing pattern. Follow the same clicking and locking process as before, ensuring the planks fit snugly together without gaps.
-
Step 4: Trim Planks as Needed
If you come across obstacles like doorways or cabinets, you may need to trim the planks to fit. Measure and mark the plank before using a saw to make precise cuts. Take your time to ensure a perfect fit.
-
Step 5: Complete the Installation
Continue installing the laminate flooring planks row by row, following the clicking and locking process. Use a tapping block and a mallet to gently tap the planks together if needed. Work methodically, paying attention to the alignment and spacing as you progress.
| Tools and Materials Needed for Clicking and Locking Laminate Flooring Installation: |
|---|
| - Laminate flooring planks |
| - Spacers |
| - Tape measure |
| - Saw |
| - Tapping block |
| - Mallet |
Dealing with Obstacles and Trim
While installing laminate flooring in your kitchen, you may encounter obstacles such as doorways and cabinets. Don't let these challenges deter you. With the right techniques and tools, you can seamlessly trim and fit the laminate around these obstacles, achieving a professional and polished look.
When it comes to doorways, you will need to cut the laminate planks to fit the space. Measure the width of the doorway and mark the plank accordingly. Use a saw or a jigsaw to make the cut, ensuring a precise fit. Remember to leave a small gap, about ¼ inch, around the perimeter of the plank to allow for expansion.
Dealing with cabinets requires a slightly different approach. Start by removing the baseboards along the cabinets. This will create space for the laminate to fit underneath. Measure and cut the planks to fit alongside the cabinet, leaving a small gap for expansion. Once the flooring is installed, you can reinstall the baseboards for a clean and finished look.
| Obstacles | Solutions |
|---|---|
| Doorways | Measure and cut the laminate to fit. Leave a small gap for expansion. |
| Cabinets | Remove baseboards, cut the laminate to fit alongside the cabinets, and reinstall the baseboards. |
By following these steps, you can overcome any obstacles that come your way during the laminate flooring installation in your kitchen. Remember, attention to detail and patience will ensure a beautiful and functional result.
Finishing Touches and Cleaning Up
As you reach the final stages of your laminate flooring installation in the kitchen, it's time to add those finishing touches that will elevate the overall look and ensure a clean and polished result. Adding baseboards and transitions will not only provide a seamless transition between the laminate and other flooring surfaces but also serve as a protective barrier for the edges of your newly installed laminate planks.
To complement your laminate flooring and create a cohesive aesthetic, choose baseboards and transitions that match or closely coordinate with the color and style of your laminate. Measure and cut them to fit precisely along the edges, ensuring a tight and secure fit.
Attaching Baseboards
To attach the baseboards, use adhesive or finish nails. First, apply a thin line of adhesive along the back of the baseboard, then press it firmly against the wall, ensuring it is level. Alternatively, you can use finish nails to secure the baseboard, making sure to pre-drill holes to prevent splitting. Repeat this process for all the walls in your kitchen.
Installing Transitions
Transitions are vital for bridging the gap between the laminate flooring and adjacent surfaces, such as carpet, tile, or hardwood. They not only create a smooth and safe transition but also protect the edges of the laminate from moisture and potential damage. Choose transitions that complement your laminate flooring style and measure them to fit the doorway or threshold accurately.
Installing transitions is relatively simple. Start by attaching the metal or wooden track to the subfloor, securing it in place with screws or adhesive. Then, slide the transition piece into the track, making sure it sits snugly against the laminate flooring. Use a rubber mallet to tap it gently into place for a secure fit. Repeat this process for each threshold or doorway where a transition is required.
Pro Tip: When installing transitions, allow for an expansion gap by leaving a small space between the transition and the laminate flooring. This allows the laminate to expand and contract naturally with temperature and humidity changes, preventing buckling or warping.
Once you have completed the installation process, it's important to give your kitchen a thorough clean-up. Removing any debris, dust, or adhesive residue will not only enhance the visual appeal of your new laminate flooring but also ensure its longevity and durability.
Cleaning Up
Use a soft broom, vacuum cleaner, or microfiber mop to remove any loose dirt, dust, or debris from the surface of the laminate flooring. Take care to remove any adhesive or caulk residue left behind during the installation process.
For a deeper clean, dampen a microfiber cloth or mop with a mild laminate floor cleaner diluted according to the manufacturer's instructions. Gently mop the entire surface, avoiding excessive moisture that could seep into the laminate's seams. Dry the floor thoroughly with a clean, dry cloth to prevent any water damage.
Pro Tip: Avoid using abrasive cleaners, harsh chemicals, or steam mops on your laminate flooring, as these can cause damage and void any warranty.
With your baseboards in place, your transitions installed, and your kitchen thoroughly cleaned, you can now step back and admire the transformation you've achieved through your DIY kitchen renovation. Your newly installed laminate flooring not only enhances the beauty of your kitchen but also provides a durable and low-maintenance surface that will withstand daily wear and tear.
Maintaining and Caring for Laminate Flooring
Once you've completed the installation of your beautiful laminate flooring in the kitchen, it's important to know how to properly maintain and care for it to ensure its longevity and keep it looking its best. Follow these laminate flooring tips to keep your kitchen floor in top condition:
Routine Cleaning
To keep your laminate flooring clean, it's essential to establish a regular cleaning routine. Start by sweeping or vacuuming the floor to remove any loose dirt or debris. Then, use a damp mop or cloth to wipe away any stains or spills. Avoid using excessive water, as this can cause damage to the laminate. Instead, use a mild cleaning solution specifically formulated for laminate floors. Remember to dry the floor thoroughly after cleaning to prevent any moisture from seeping into the laminate.
Avoiding Damage
To prevent damage to your laminate flooring, it's important to implement a few preventative measures. Place doormats at entrances to help trap dirt and prevent it from scratching the floor. Use felt pads under furniture legs to avoid scratches and dents. Avoid dragging heavy furniture or sharp objects across the floor, as this can cause visible damage. Additionally, consider using rugs or mats in high-traffic areas to further protect the laminate.
Addressing Water Spills
While laminate flooring is generally resistant to water, it's still important to promptly address any spills or moisture. Wipe up spills immediately using a clean, dry cloth. Avoid using excessive water or wet mops, as this can seep through the joints and cause the floorboards to swell or warp. If water spills onto the floor, dry it immediately to prevent any potential damage.
Protecting Against Scratches
Laminate flooring can be susceptible to scratches, especially in high-traffic areas. To protect against scratches, consider using furniture pads or coasters under heavy items. Avoid walking on the floor with sharp heels or shoes that may cause indentations. Regularly sweep or vacuum the floor to remove any abrasive dirt or debris that could potentially scratch the surface.
Proper Care for Specific Stains
It's common for kitchens to experience spills and stains. Here's how to tackle some common kitchen stains on laminate flooring:
| Stain Type | Stain Removal Method |
|---|---|
| Grease or Oil | Use a mild soap or dish detergent mixed with warm water. Gently scrub the stain with a soft cloth or sponge. Rinse thoroughly and wipe dry. |
| Red Wine or Fruit Juice | Blot the stain immediately with a clean cloth or paper towel. Mix a solution of equal parts water and white vinegar. Apply the mixture to the stain and gently scrub. Rinse thoroughly and wipe dry. |
| Coffee or Tea | Blot the stain immediately with a clean cloth or paper towel. Mix a solution of warm water and mild detergent. Apply the mixture to the stain and gently scrub. Rinse thoroughly and wipe dry. |
| Permanent Marker | Gently dab the stain with a cloth soaked in rubbing alcohol. Avoid rubbing vigorously, as this can spread the stain. Rinse thoroughly and wipe dry. |
By following these laminate flooring care tips, you can keep your kitchen floor looking beautiful and vibrant for years to come. Remember to always consult the manufacturer's recommendations for specific cleaning products and methods to avoid any potential damage to your laminate floor.
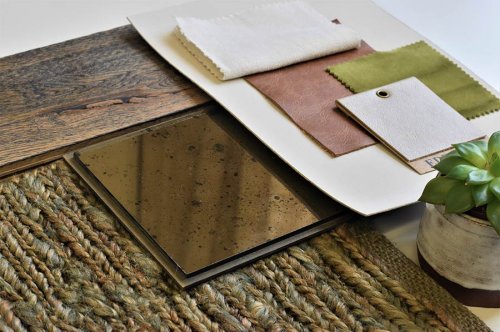
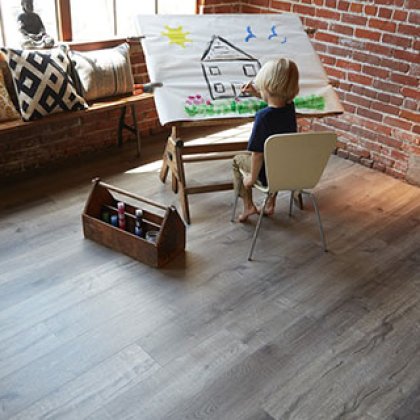
Enhancing Your New Kitchen Space
Now that you have successfully installed laminate flooring in your kitchen, it's time to take your kitchen renovation to the next level. By focusing on lighting, decor, and other design elements, you can truly transform your space and create a kitchen that not only looks beautiful but also functions efficiently.
1. Lighting
Proper lighting can make a world of difference in any room, and the kitchen is no exception. Consider incorporating a mix of task lighting, ambient lighting, and decorative lighting to create a well-lit and inviting space. Under-cabinet lighting can illuminate your workspace, pendant lights can add a stylish touch above the kitchen island, and recessed lights can provide overall illumination.
2. Decor
Add personality and charm to your kitchen by incorporating decorative elements that reflect your personal style. Display colorful artwork, hang floating shelves to showcase your favorite dishes or cookbooks, and accessorize with plants to bring life into the space. Small touches like colorful dishware, decorative jars, and countertop accessories can also add visual interest and make your kitchen feel more inviting.
3. Backsplash
A stylish backsplash can be the perfect finishing touch to your kitchen renovation. Consider installing a tile backsplash in a design or pattern that complements your laminate flooring. Whether you choose subway tiles for a classic look or mosaic tiles for a more contemporary feel, a backsplash can add texture and depth to your kitchen walls.
4. Hardware and Fixtures
Updating your kitchen hardware and fixtures can instantly modernize the space. Replace old cabinet handles and drawer pulls with sleek, modern designs, and consider upgrading your faucet to a more stylish and functional option. These small changes can have a big impact on the overall look and feel of your kitchen.
5. Window Treatments
Don't forget about the windows in your kitchen when enhancing the space. Installing window treatments like blinds, curtains, or shades can add privacy, control natural light, and bring a touch of elegance to your kitchen. Choose fabrics and colors that complement your overall kitchen theme for a cohesive look.
By incorporating these ideas and tips into your kitchen renovation, you can create a space that feels updated, stylish, and functional. Remember, the key is to personalize your kitchen and make it a reflection of your own personal style and taste. Enjoy the process of transforming your kitchen into a space that you truly love!
Conclusion
Installing laminate flooring in your kitchen can transform the space and elevate the overall aesthetic of your home. The benefits of laminate, such as durability, affordability, and easy installation, make it an excellent choice for a DIY kitchen renovation project.
By following this step-by-step laminate flooring installation guide, you can achieve professional-looking results without the need for expensive contractors. From choosing the right laminate for your kitchen to tackling obstacles and adding the finishing touches, this guide has provided you with all the necessary information to get started.
Not only does laminate flooring offer an array of style options to suit your taste, but it is also easy to clean and maintain, making it perfect for busy kitchens. With proper care, your new laminate flooring will remain beautiful and functional for years to come.
So, what are you waiting for? Embrace the DIY spirit and embark on your own kitchen renovation journey. Let your creativity flow, and enjoy the satisfaction of transforming your kitchen with the timeless beauty and practicality of laminate flooring.
FAQ
What are the benefits of installing laminate flooring in a kitchen?
Laminate flooring is a popular choice for kitchens due to its durability, affordability, and easy installation. It is resistant to scratches, stains, and fading, making it ideal for high-traffic areas like the kitchen. Furthermore, laminate flooring comes in a wide range of styles, allowing homeowners to achieve the look they desire without breaking the bank.
How do I choose the right laminate flooring for my kitchen?
When selecting laminate flooring for your kitchen, consider factors such as durability, style, and budget. Opt for a laminate with a high AC rating, which indicates its ability to withstand wear and tear. Look for a design that complements your kitchen's aesthetic, whether it's contemporary, farmhouse, or traditional. Lastly, determine a budget that suits your needs, keeping in mind that laminate flooring offers excellent value for money.
What preparations should I make before installing laminate flooring in my kitchen?
Before starting the installation process, it's important to remove any existing flooring and thoroughly clean the subfloor. This ensures a solid base for the new laminate flooring. Additionally, ensure that the surface is smooth and free from any debris or imperfections. Taking the time to properly prepare the kitchen will result in a more successful installation.
What tools and materials do I need for laminate flooring installation in a kitchen?
To install laminate flooring in a kitchen, you will need a tape measure, a saw (such as a circular saw or jigsaw), a utility knife, a rubber mallet, a pry bar, a tapping block, a pull bar, a hammer, and a carpenter's square. In terms of materials, you will need laminate planks, underlayment, adhesive (if required), spacers, and transition pieces.
How do I measure and plan the layout for laminate flooring installation in my kitchen?
Start by measuring the length and width of the kitchen, taking note of any irregularities or unique features. Use these measurements to calculate the square footage required for the laminate flooring. Before laying the planks, it's essential to plan the layout to ensure a visually appealing design. Consider starting in a corner and working your way out, avoiding small cuts and maintaining a consistent pattern.
What is the purpose of underlayment in laminate flooring installation?
Underlayment is a crucial component of laminate flooring installation in a kitchen. It provides a moisture barrier, preventing water damage and offering added insulation and soundproofing. Additionally, underlayment creates a cushioned surface for the laminate, enhancing comfort and reducing the likelihood of cracks or buckling.
How do I click and lock the laminate flooring planks together during installation?
Click-and-lock or "floating" installation is a common method for installing laminate flooring. Simply align the short end of one plank with the long side of another at a slight angle. Gently press down or tap with a rubber mallet to secure the planks together, creating a tight connection. Repeat this process for all the planks, working row by row until the entire kitchen floor is covered.